A while ago I was gifted a couple of large boxes of model railroad stuff by a friend. It had belonged to her husband and he was no longer interested in it. Most of the stuff inside was junk, but there are a few buildings I might repurpose and a couple of old wooden boxcars that would make good maint buildings.
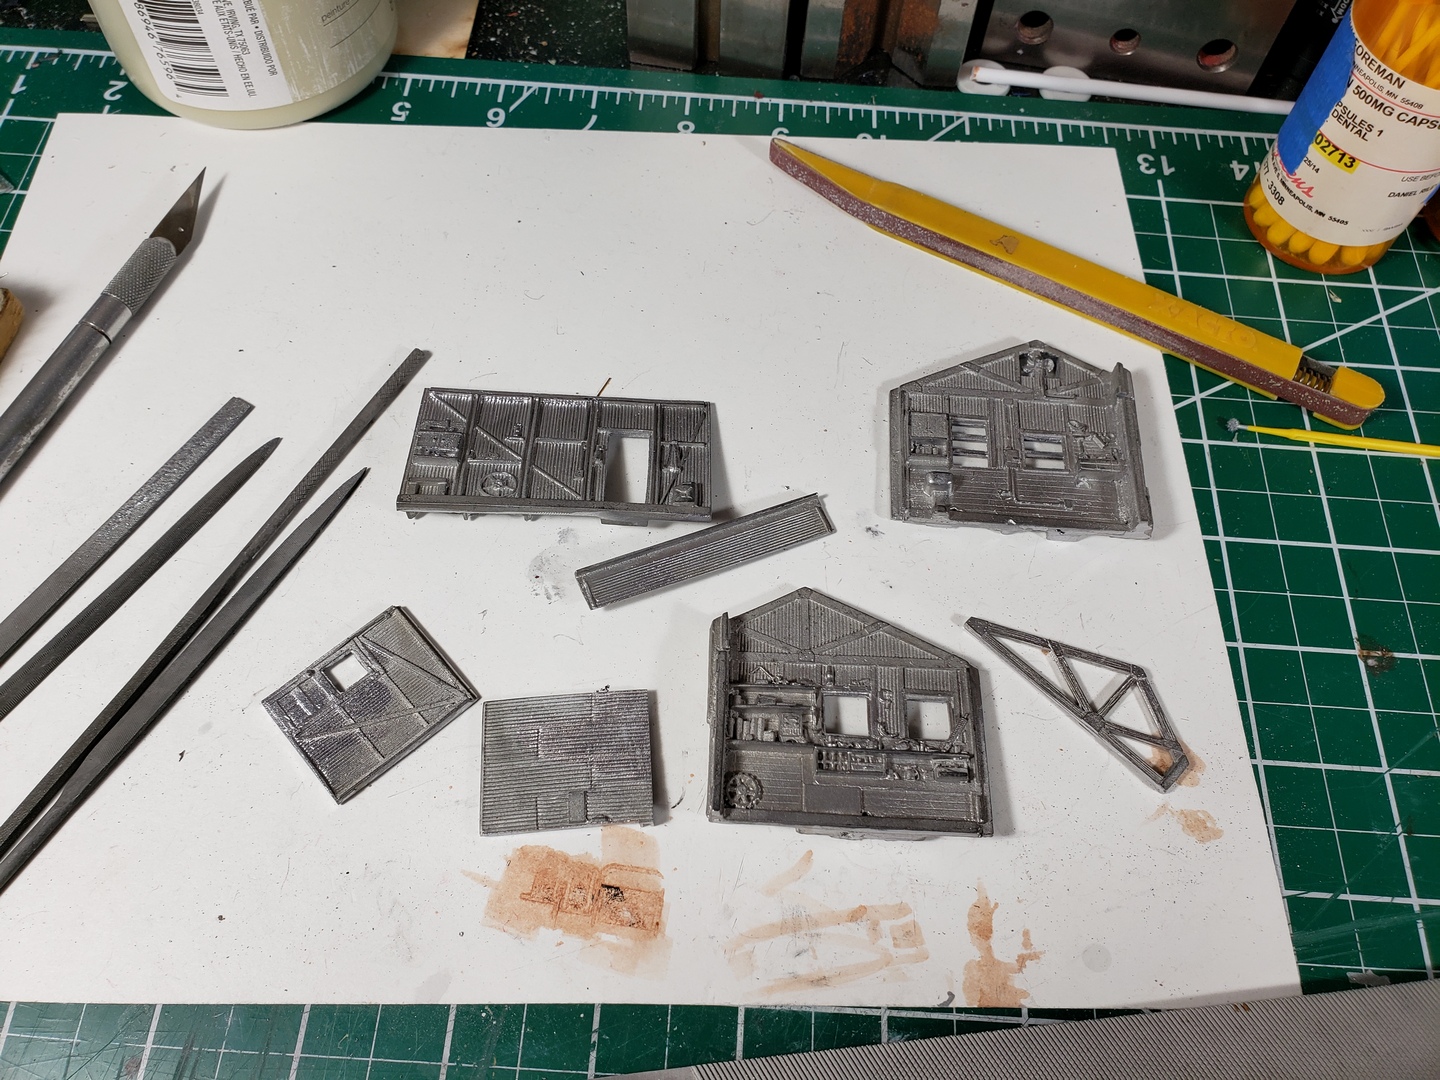
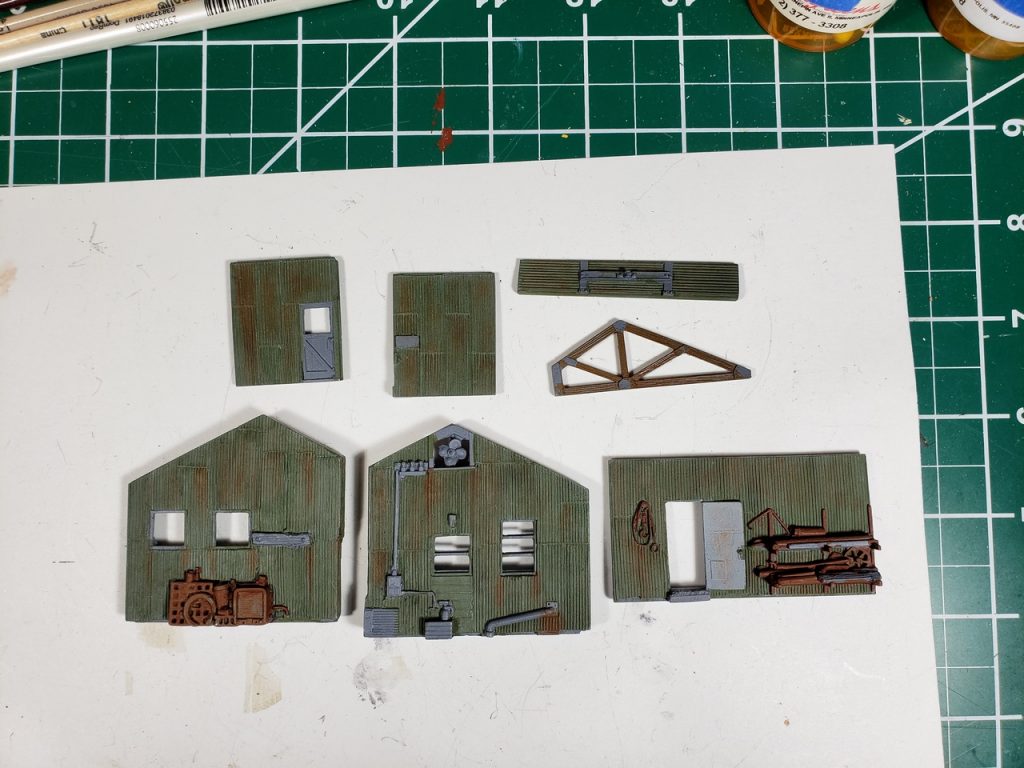
Also in the box was a complete Woodland Scenics Tucker Brothers Machine Shop cast metal kit. The copyright on the instructions is 1980 but you can still buy these.
This was a new thing for me. It’s the first metal kit and the first one with lots of cast-on small details to paint.
I cleaned all the flash and parting lines off with files and washed and scrubbed the parts with dish soap. Then I hit them with some primer and start painting details.
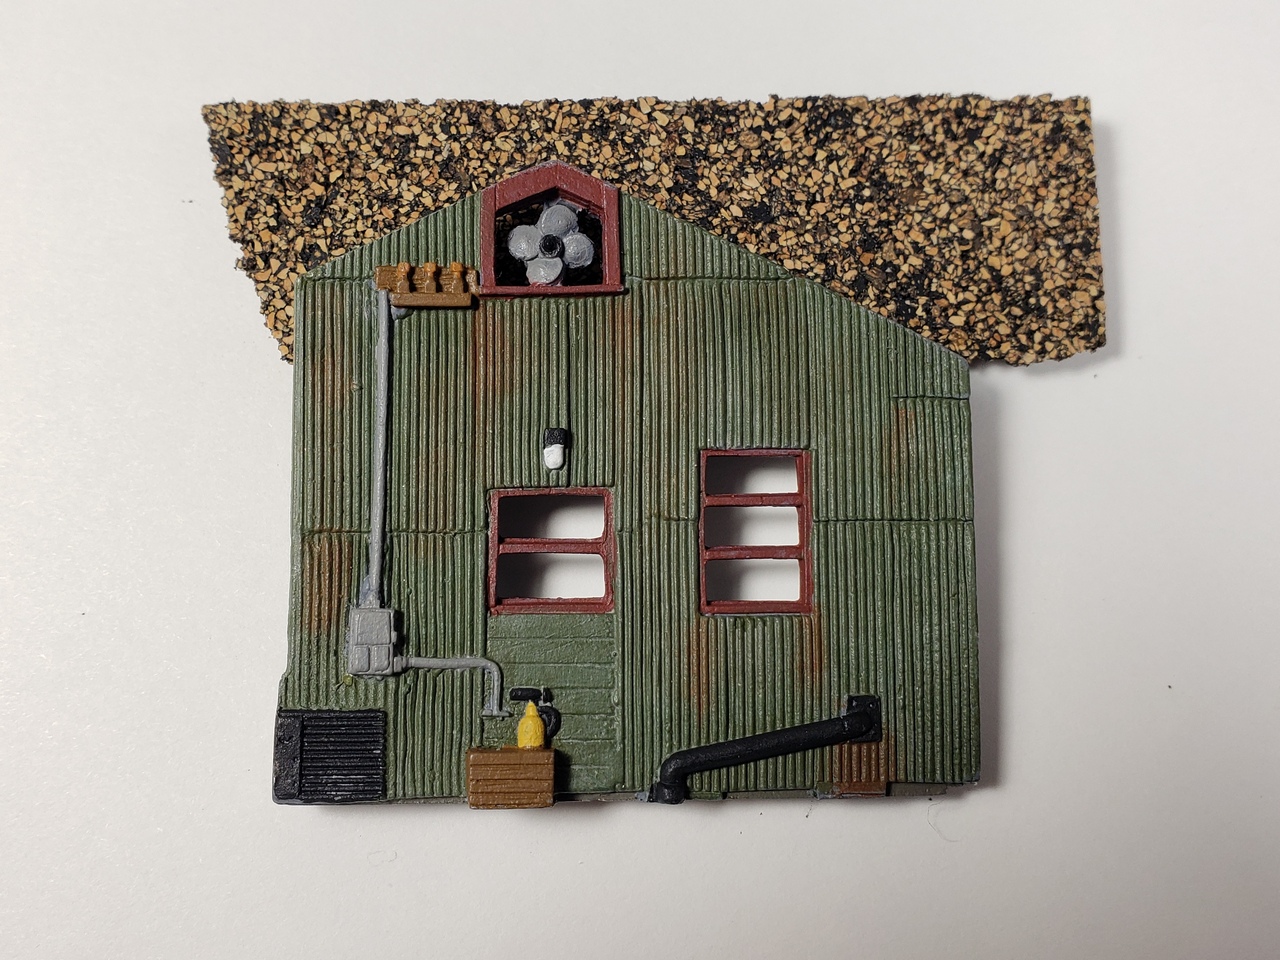
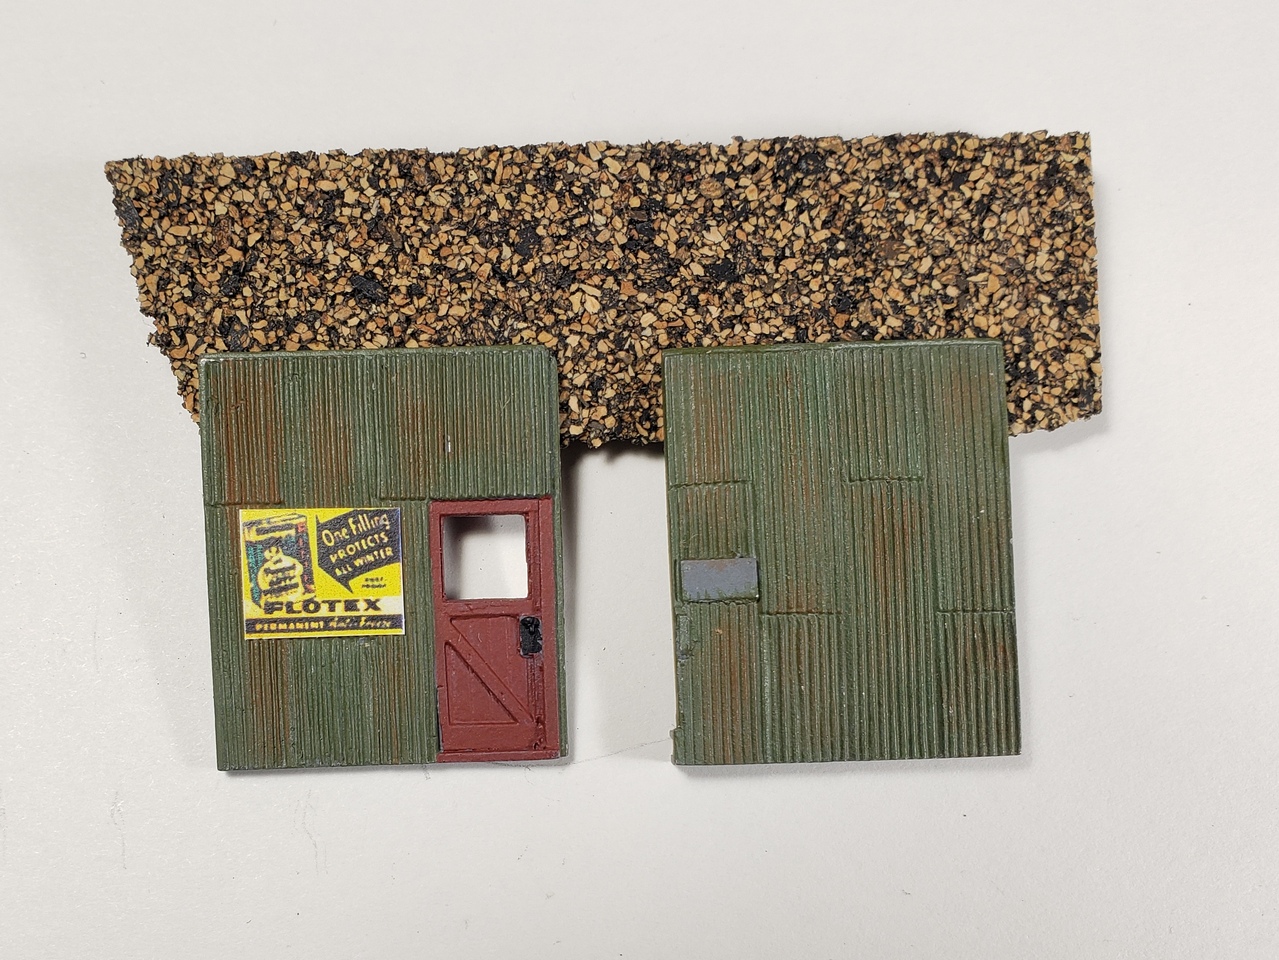
I painted the outside a nice dark green color.

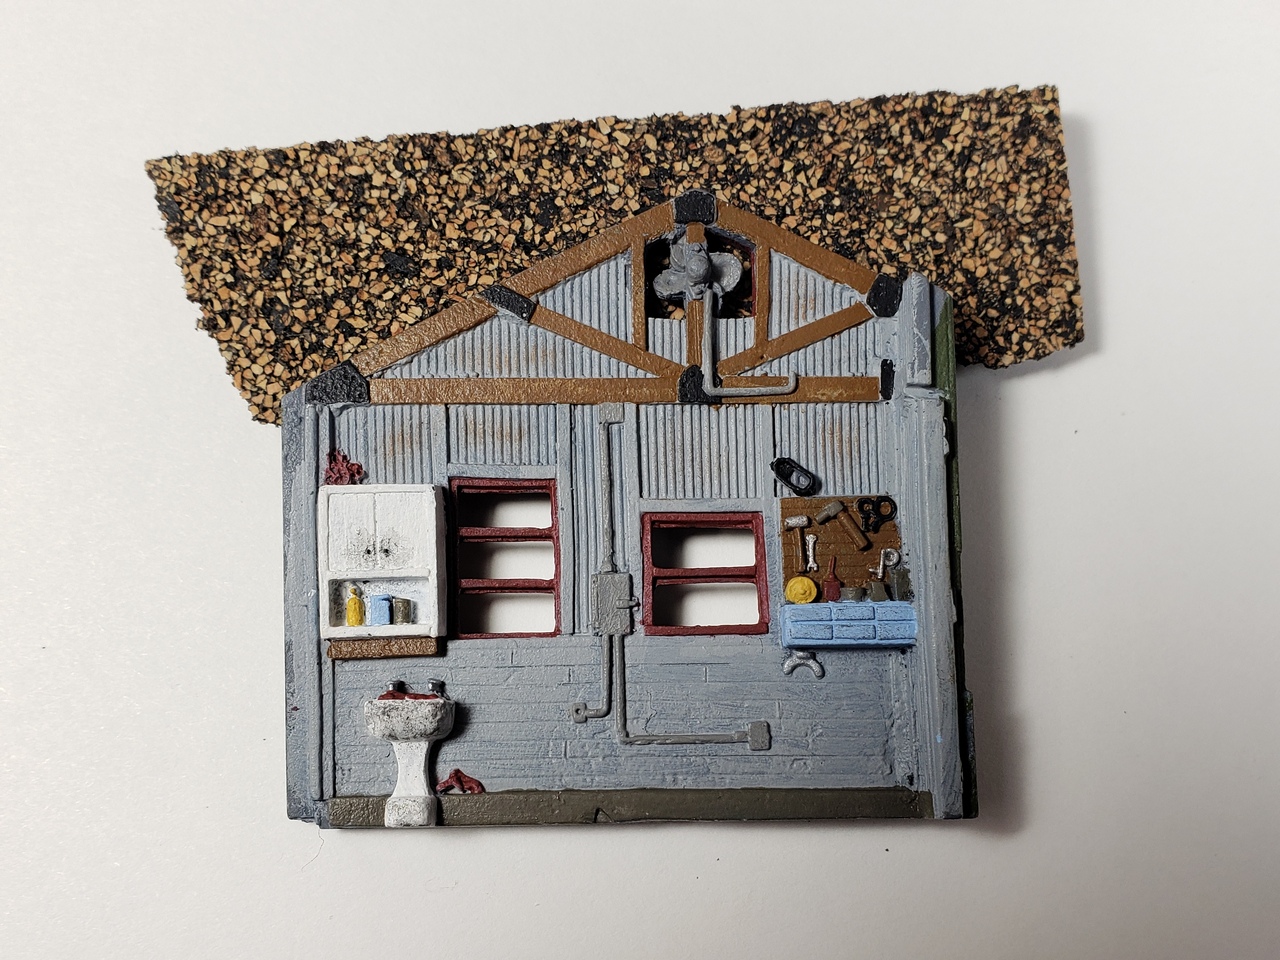
I figured the inside should be a lighter color – at least I’d want my shop to be a light color. So I painted it with some light grey.
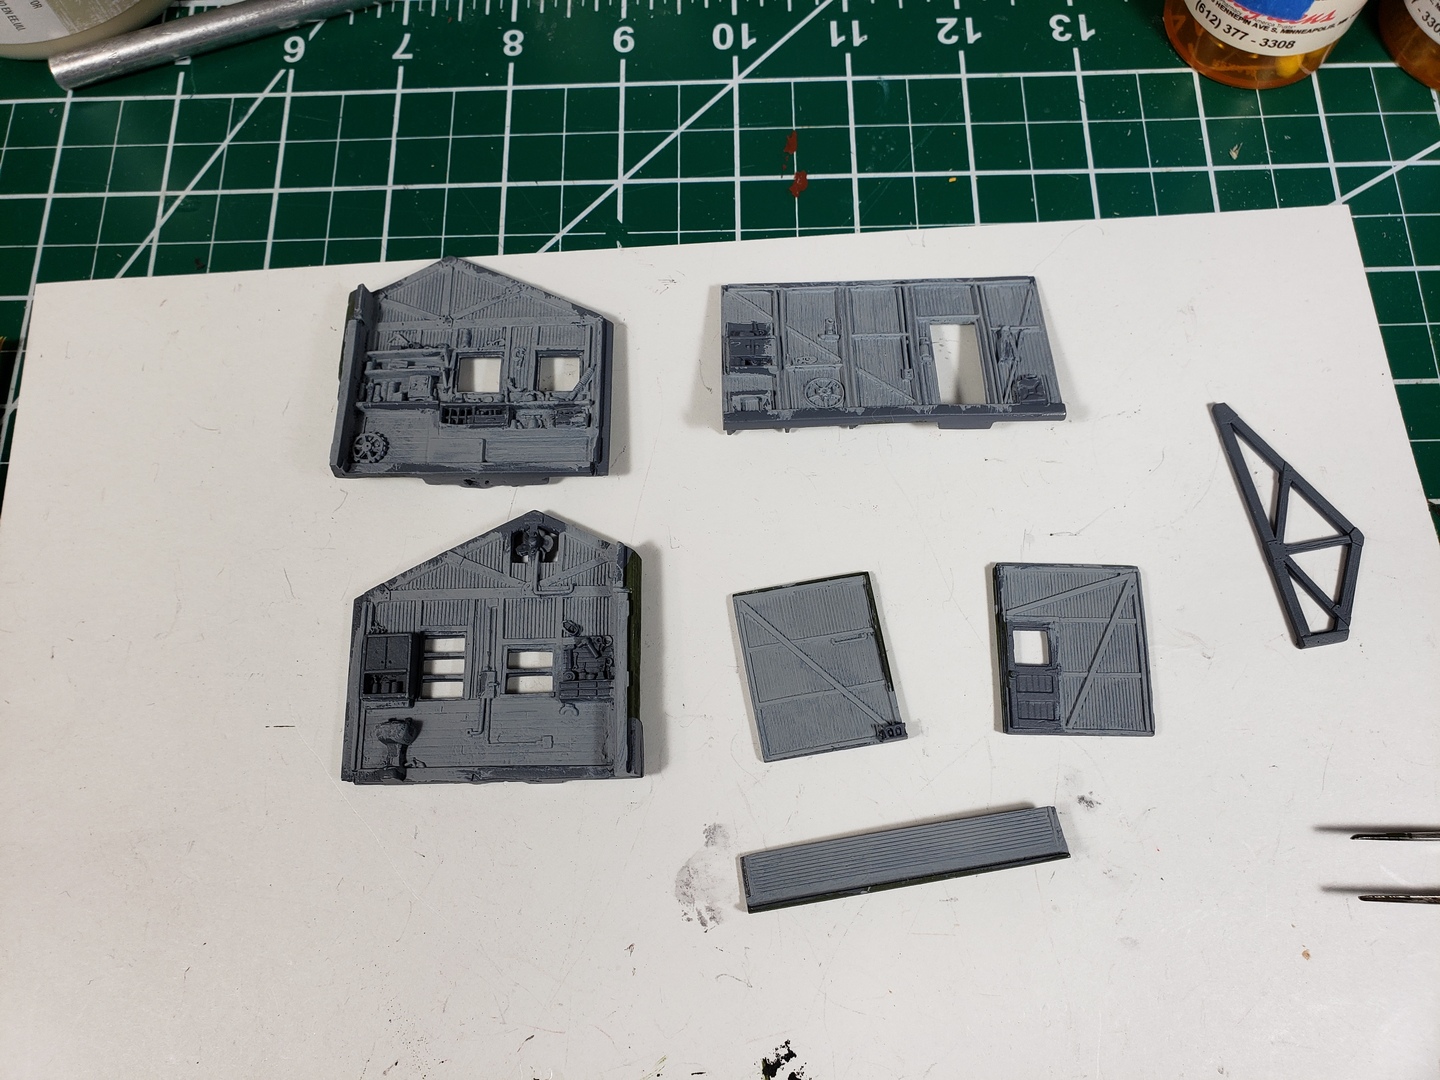
I was going to do all the beams a different color, but then I thought to myself “If I was going to paint the inside of my shop would I spend the time to paint all the beams differently? No.”
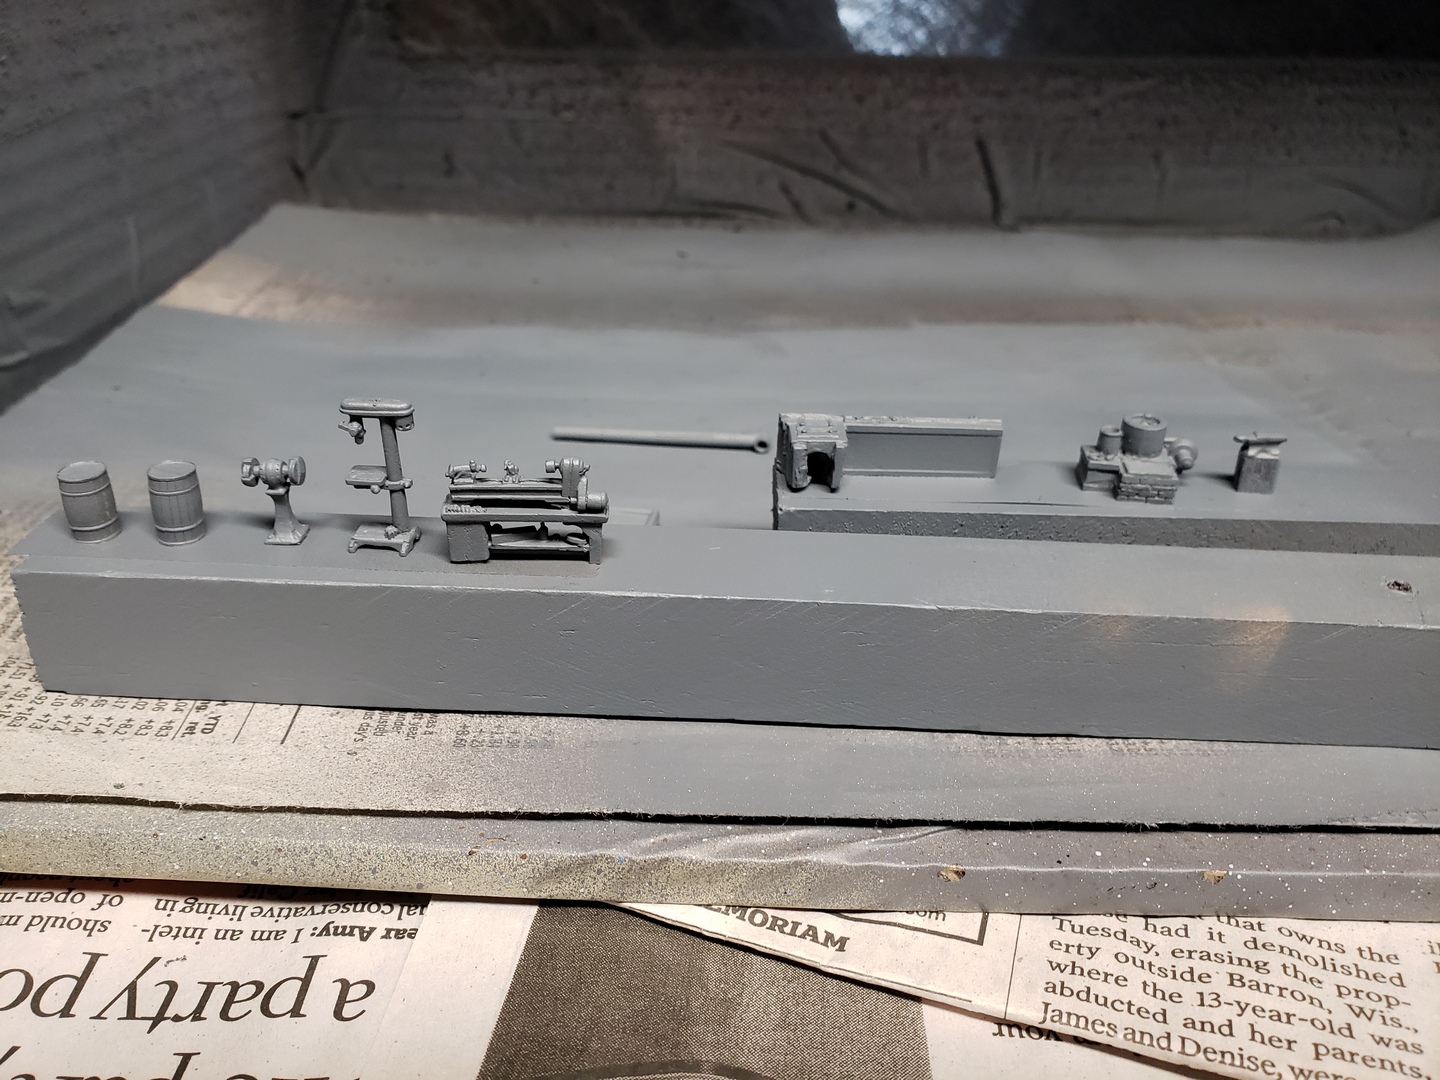
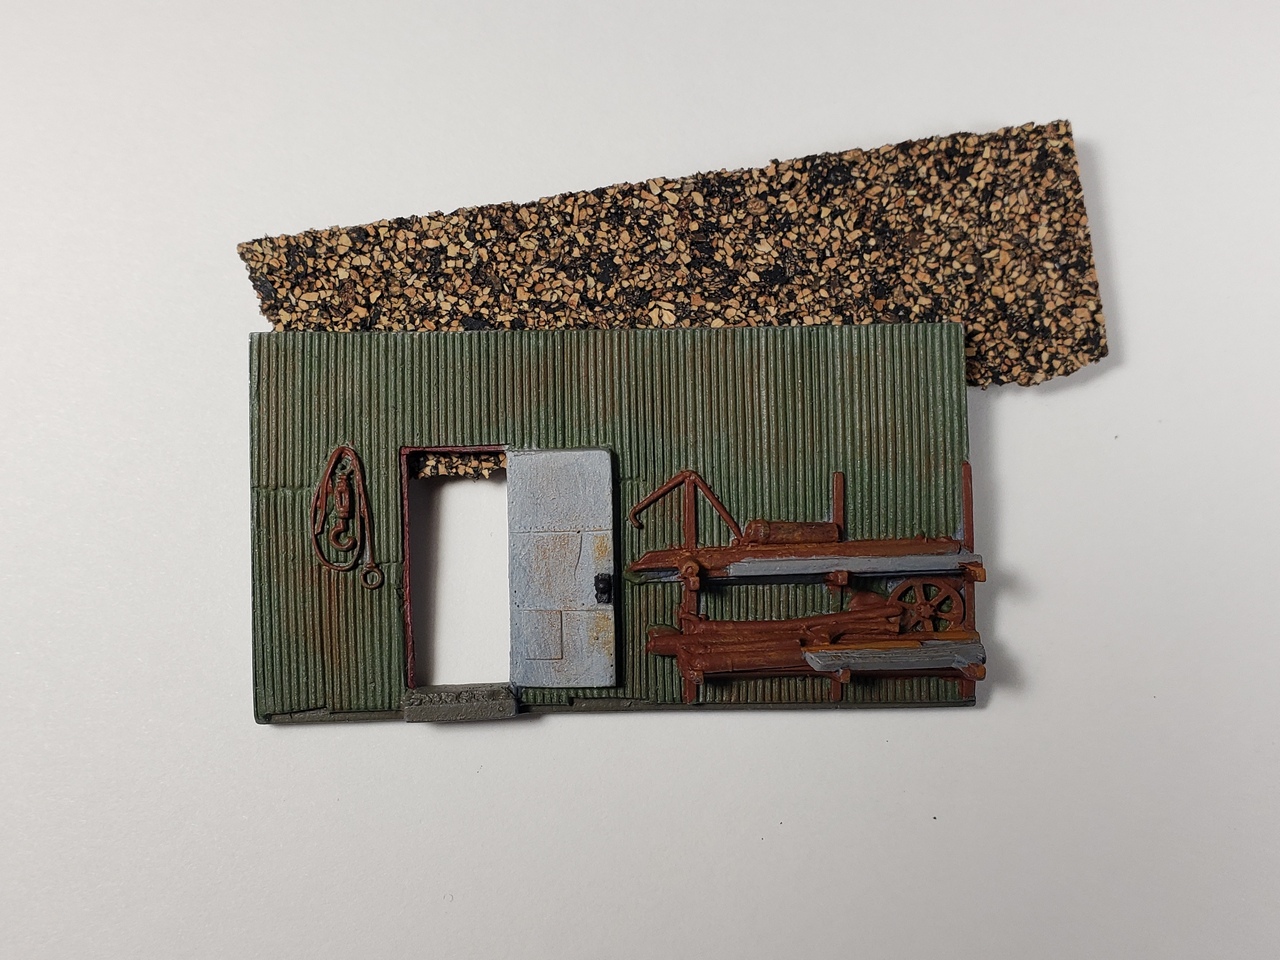
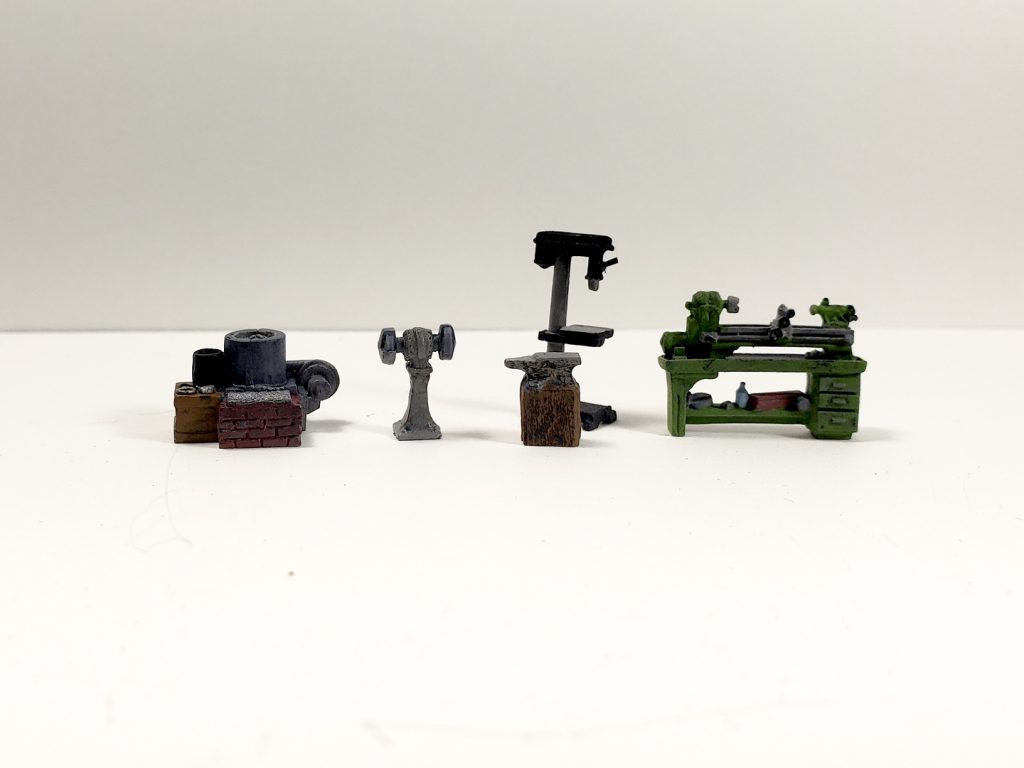
I cleaned up all the little parts – pillar drill, lathe, anvil mounted on a block of wood, etc., washed them and hit them with some primer.
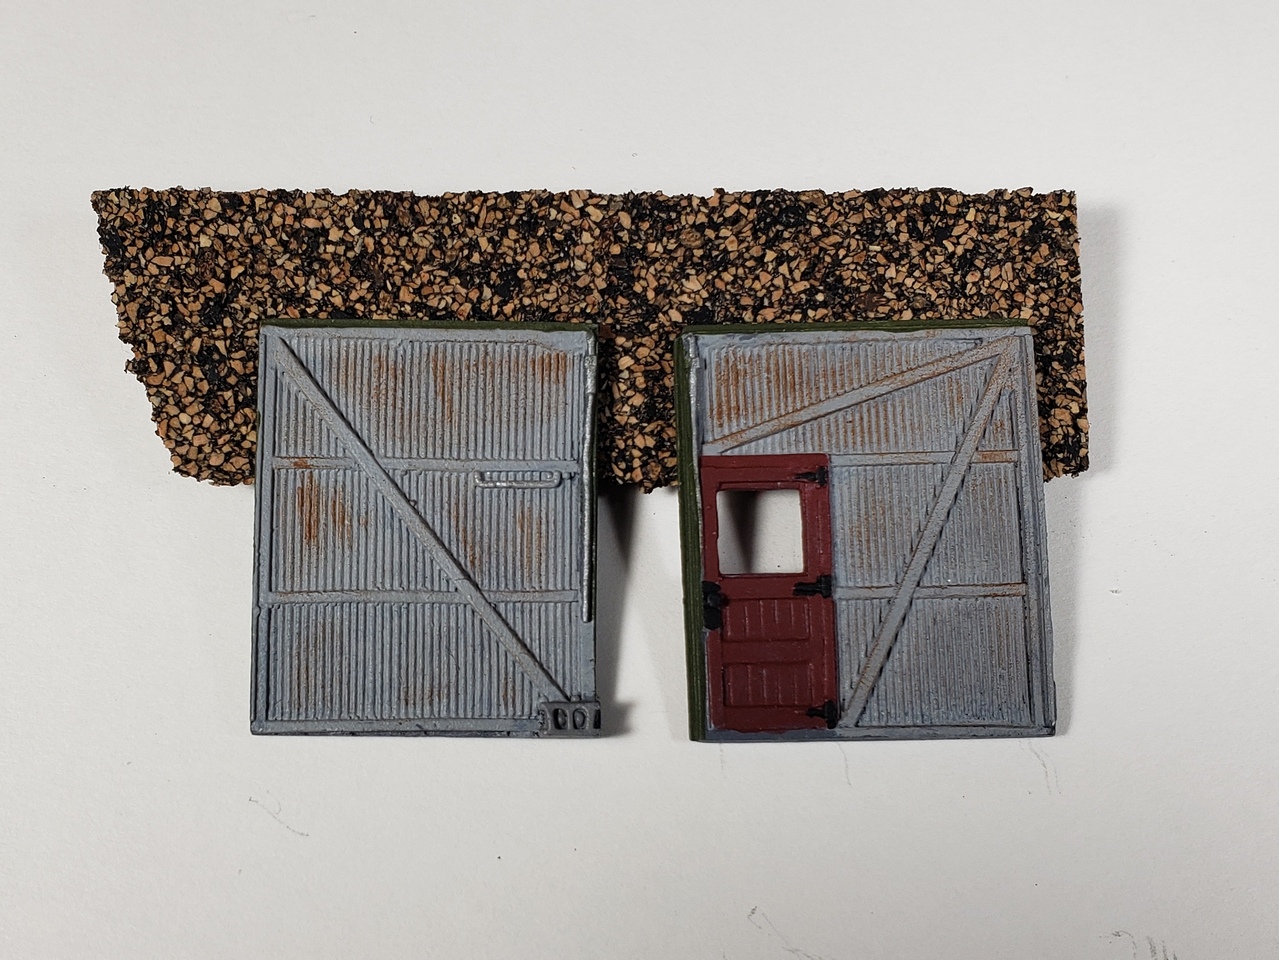
I hit the outside with a very thin white wash, almost like a reverse india ink wash. It didn’t quite give me the effect I was looking for but I think I like it. Then I added a bunch of rust, and since I had the rust out, I started painting the detritus on the outside of the building. Since it’s outside, it’s going to be rusty.
I had to paint this model in small stretches and with some strong magnifiers. It took a small brush and a steady hand and I can only sustain that for a short time.
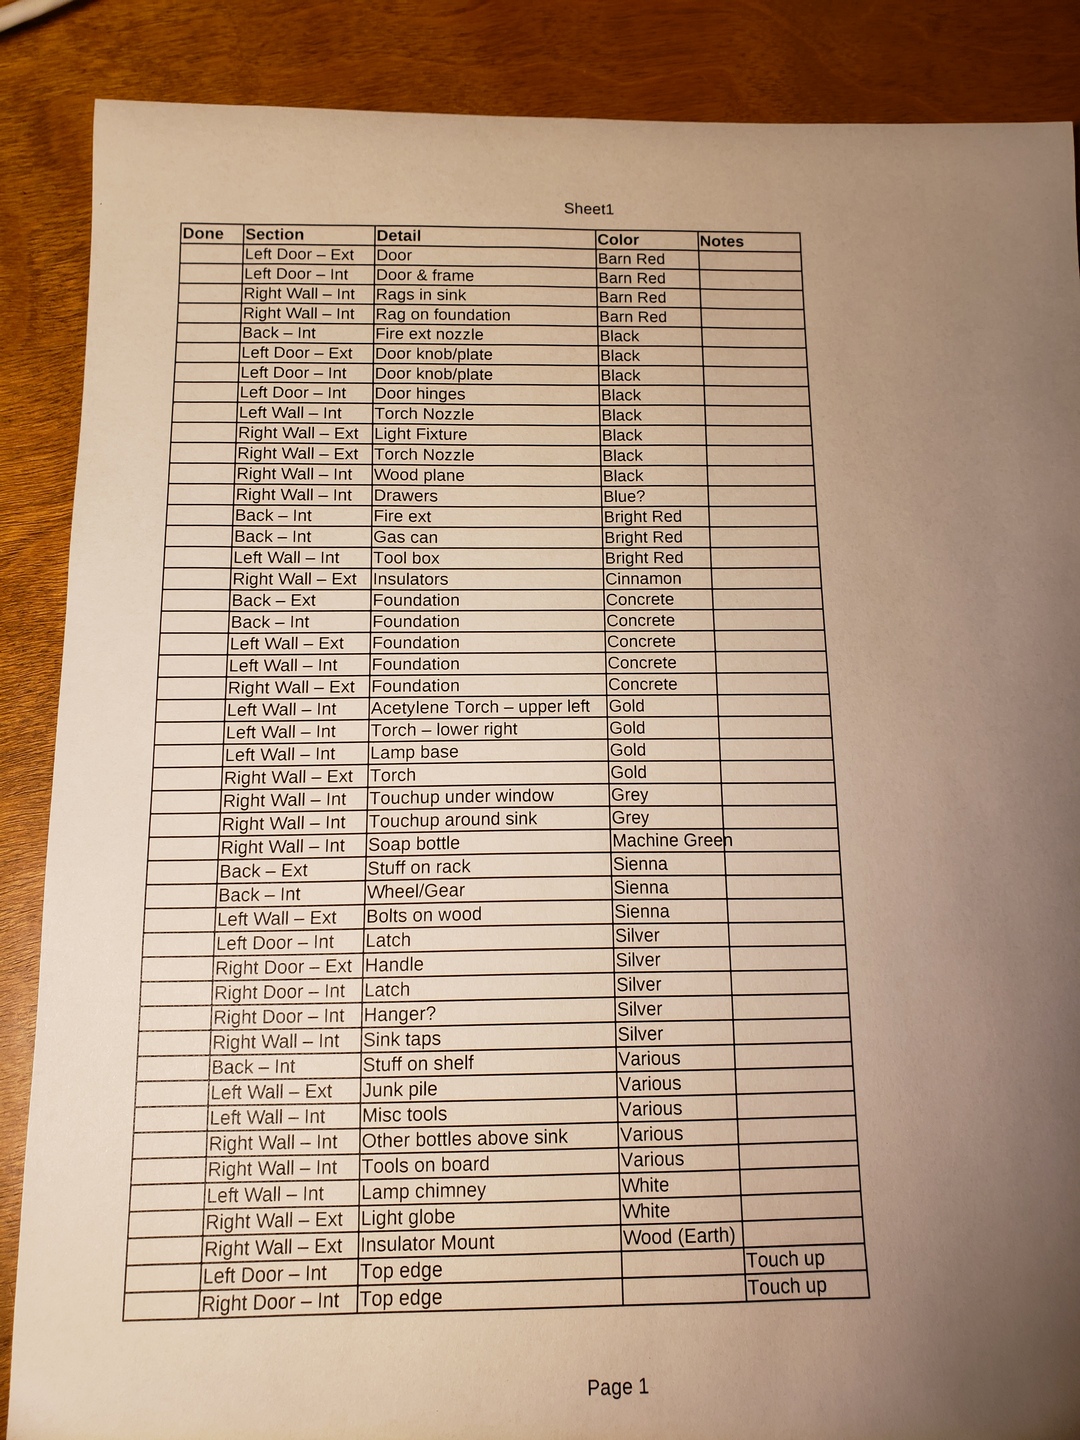
I also realized that I was having issues where as soon as I started another color I’d realize I had missed some things I wanted to paint with the last color. So I ended up making a list in Excel of all the details and what color I wanted to paint them. Then I sorted by color and printed it out and just ticked off each item.
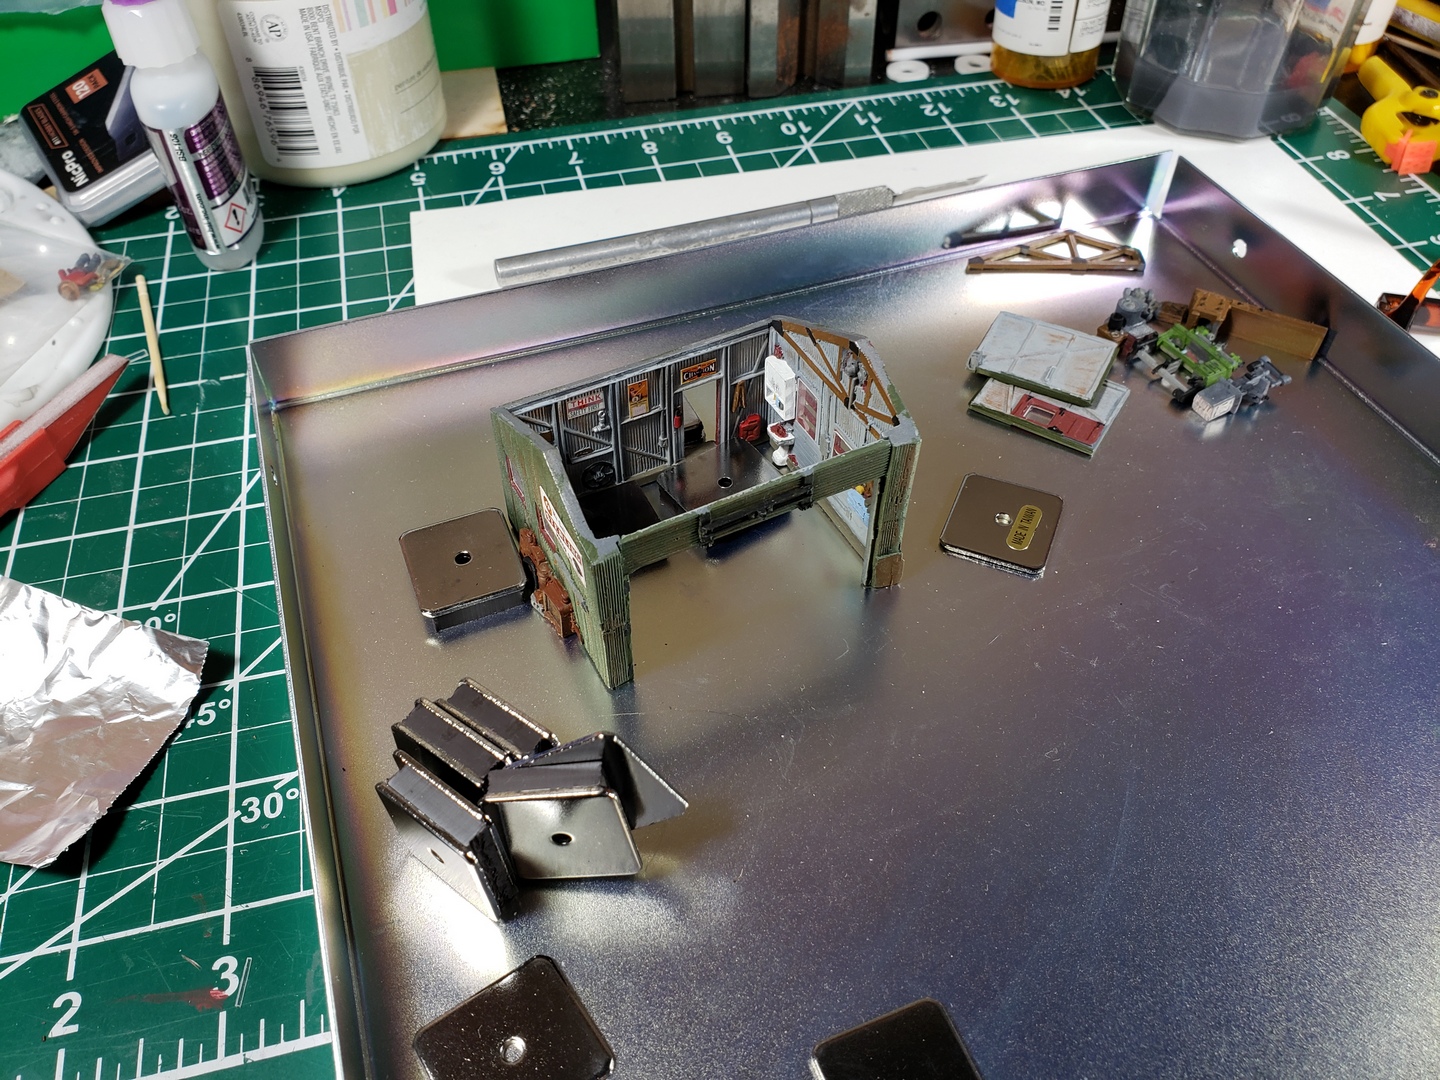
After I had the list I just went along and painted all the details. I’ll skip all the in-process shots, but I have pictures of all the walls, inside and out.
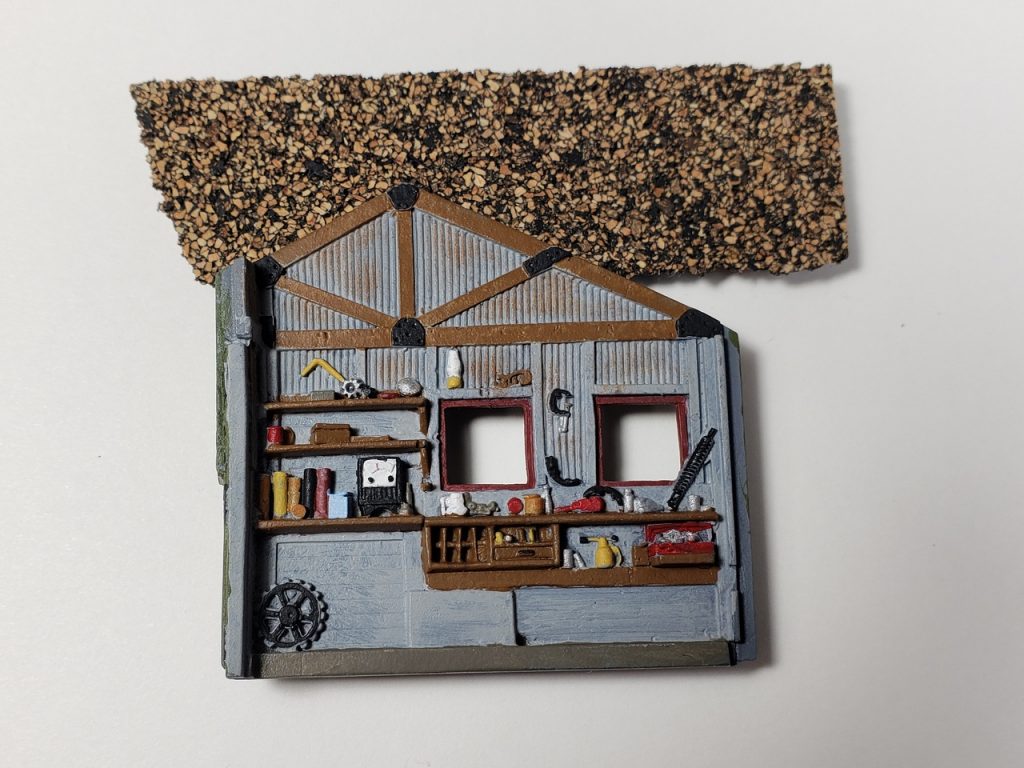
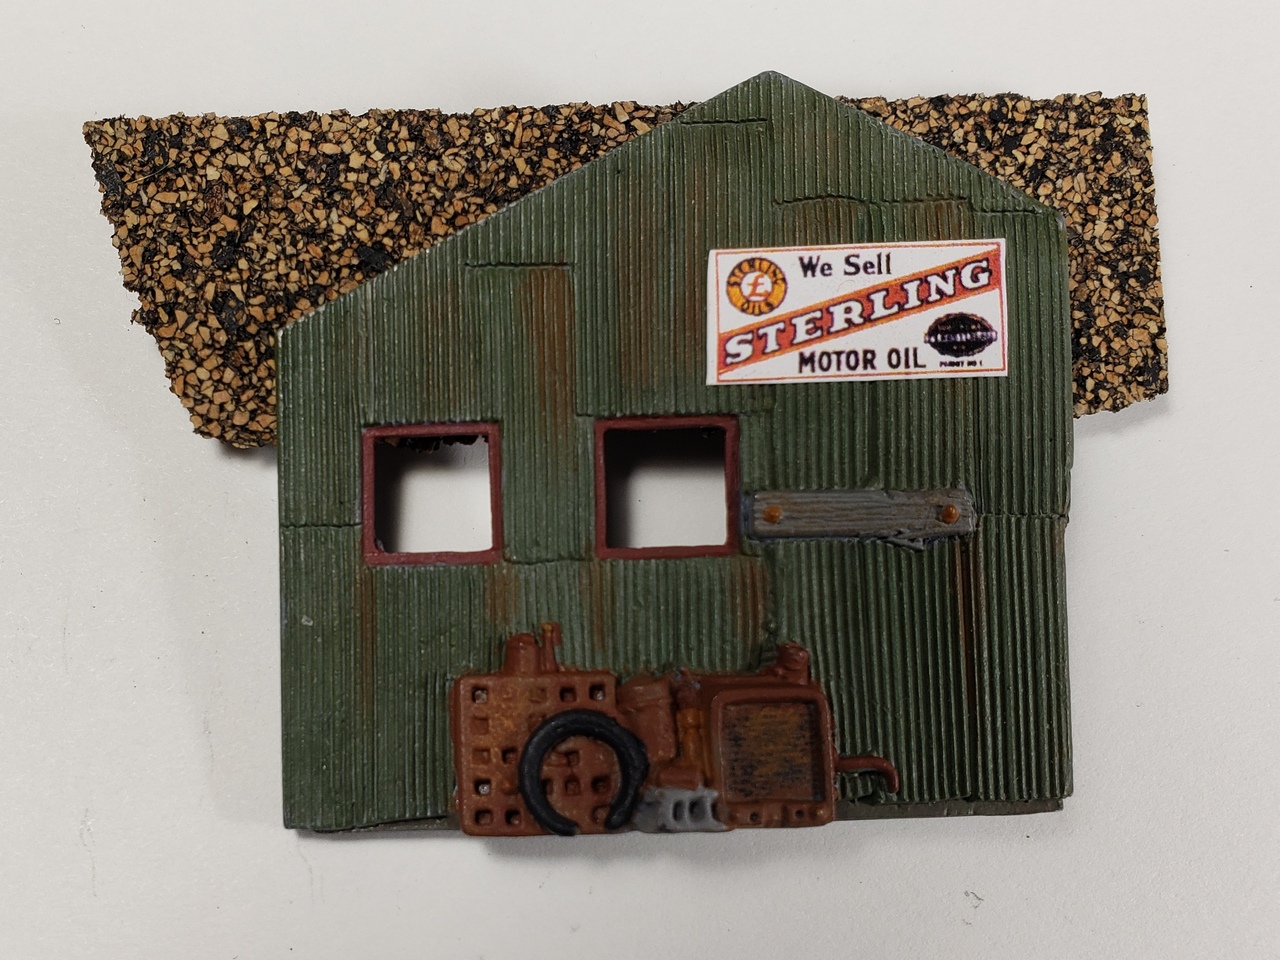
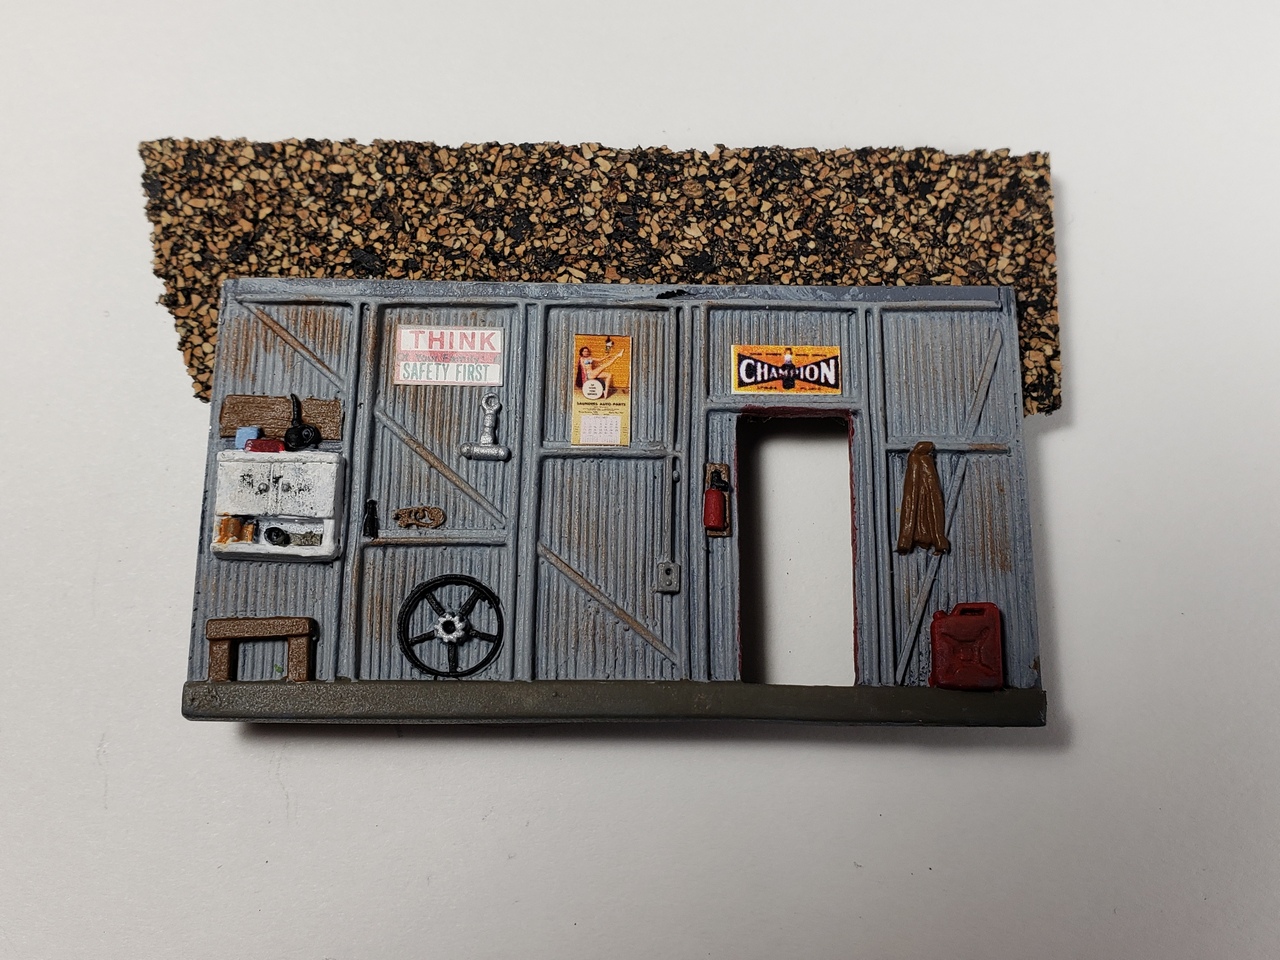
If you look at the back wall you can see a pin-up calendar.
I went and found a 1958 pinup (pretty mild one actually) calendar here. I stole the photo and scaled it to HO scale. That makes it about 3/16″ wide.
This is what it looks like printed on 4×6 photo paper. It looks really tiny. (Because it is.)
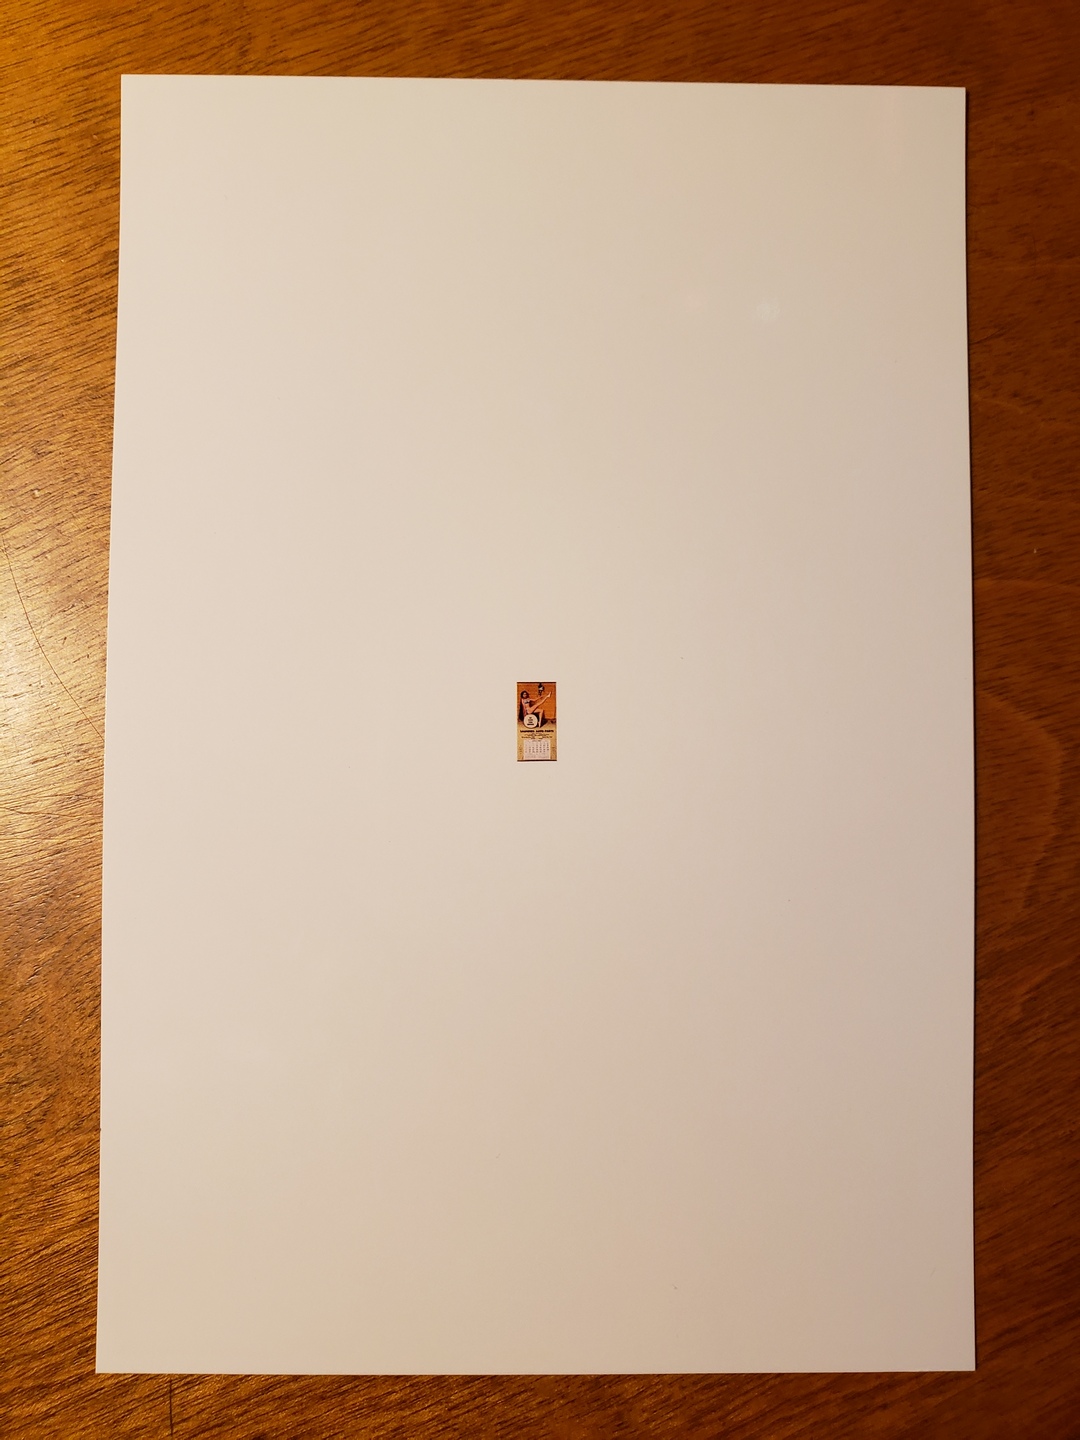
The original image was only 518×1000 pixels at 72 dpi.
The process I used was to create the calendar was to import the image into Gimp (free Photoshop) and then resize it, keeping the original size, but up sample it to 600 dpi. Then I resized it to the width I wanted (3/16″) and printed it on photo paper. I think the key to making it look so good is to up sample it and print it at 600 dpi. You can get away with that if you know you are going to shrink the image a lot. The final image is only 112 x 223 pixels.
The next step was to install the window glazing. I used some .015″ thick clear styene, but I’m not happy with it. I think I will remove it and try using some Krystal Kleer instead.
Anyway, after glazing the windows it was time to assemble the building.
What happened next was disappointing but not unexpected. I had glued the walls together with gap-filling CA but when I picked it up to get ready to cut the flooring it fell apart. I don’t know what it is, but my experience with CA has always been hit and miss. Sometimes it never hardens, sometimes it instantly glues my fingers to the part.
Anyway I just glued it up for round two with some five minute epoxy and that did the trick. Lesson learned.
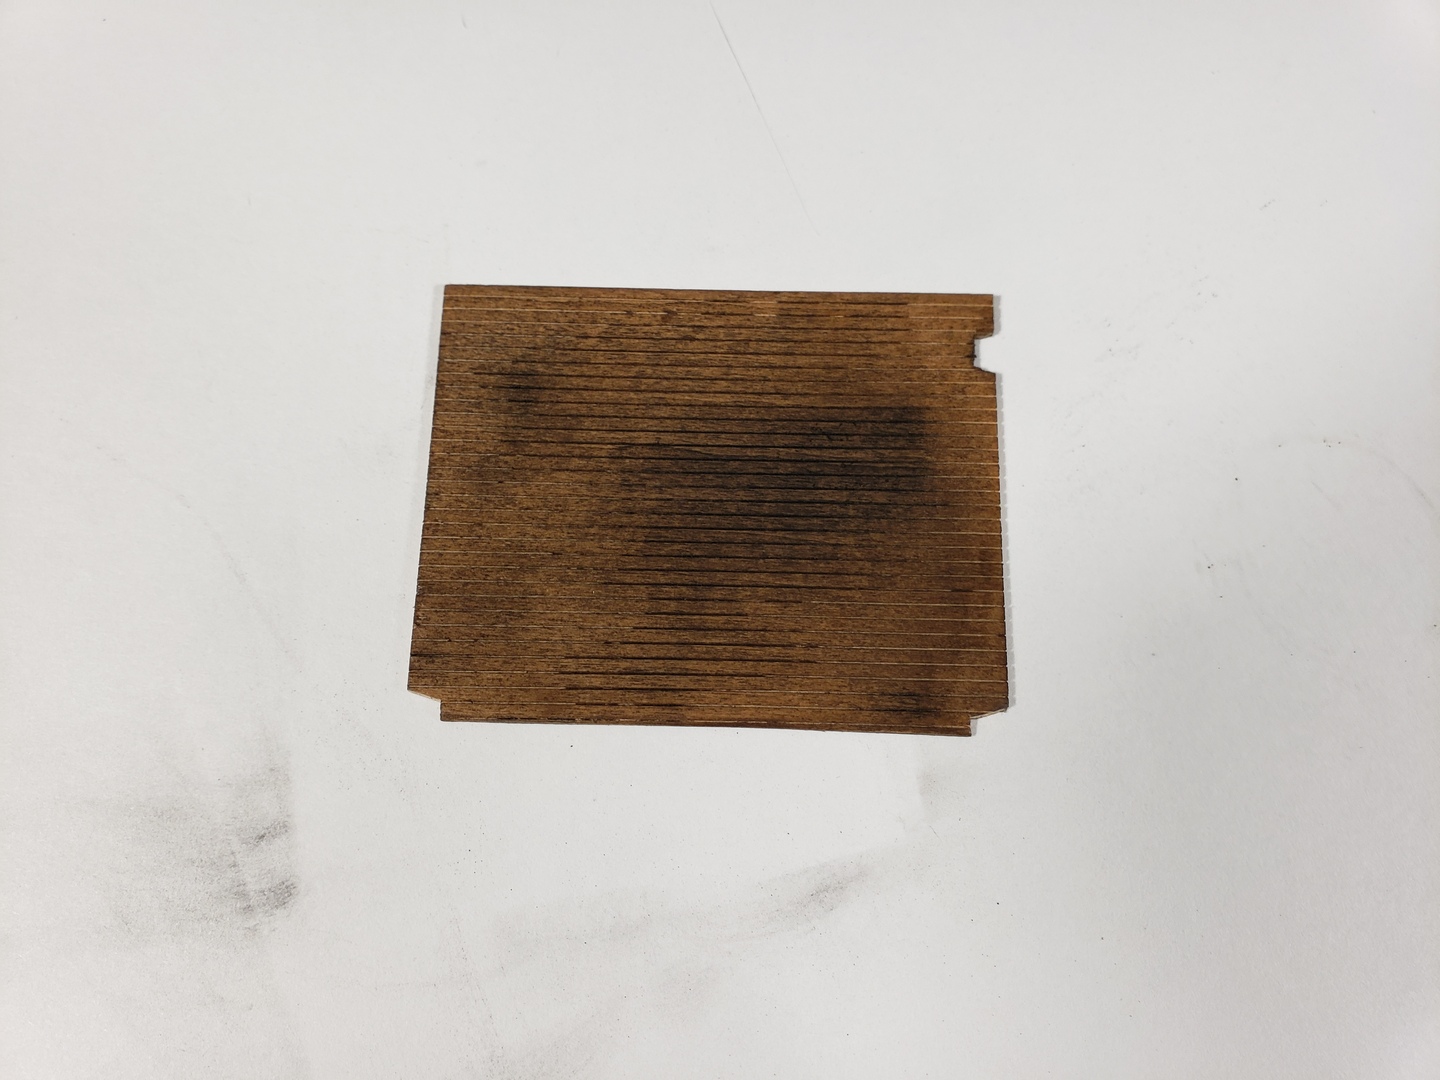
The next step was to cut out the floor and stain it. After that I hit it with some black powdered pigment.
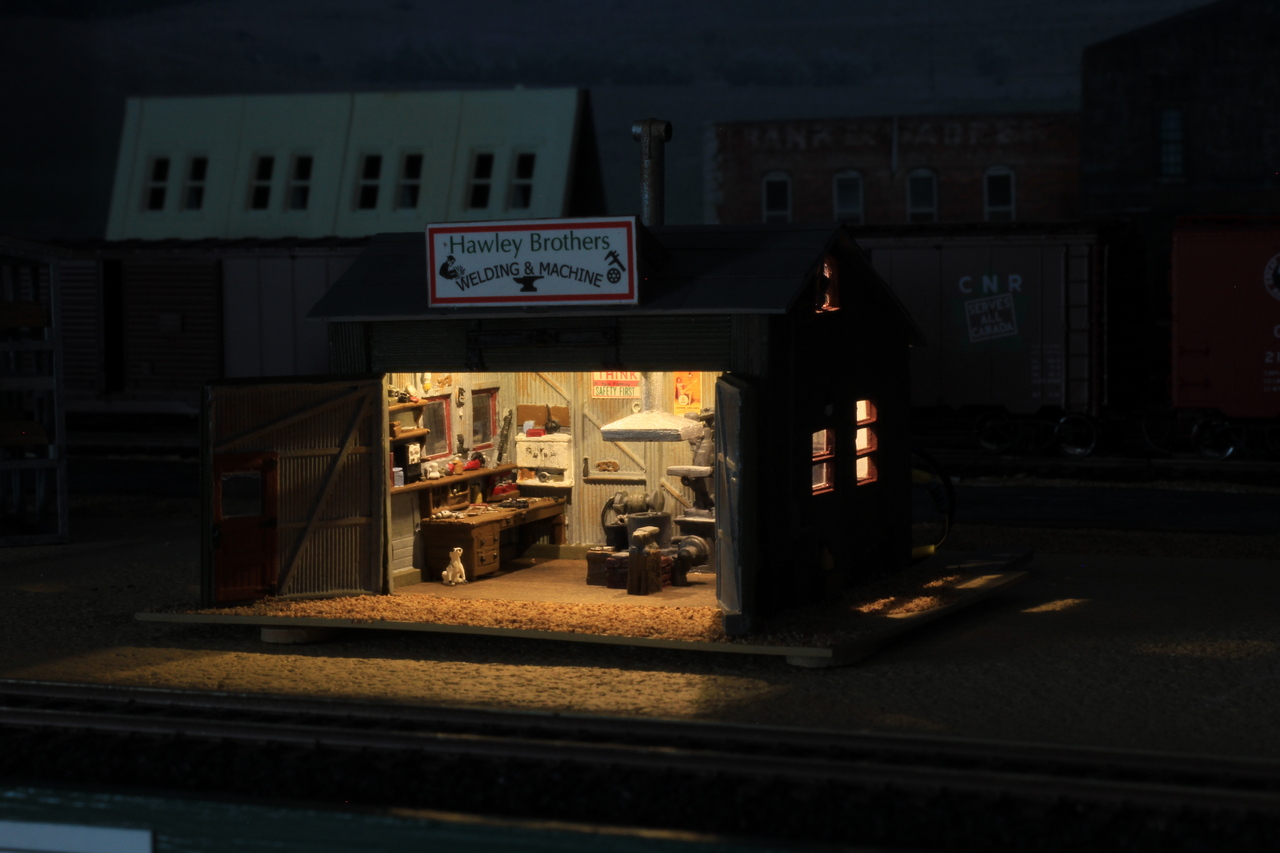
I faffed around with the roof for a while, but I wasn’t happy with how it was going, so I decided to move on to something else. I want to install lights so I noodled around a little with how that might work and decided that I’d glue in a beam to attach them to.
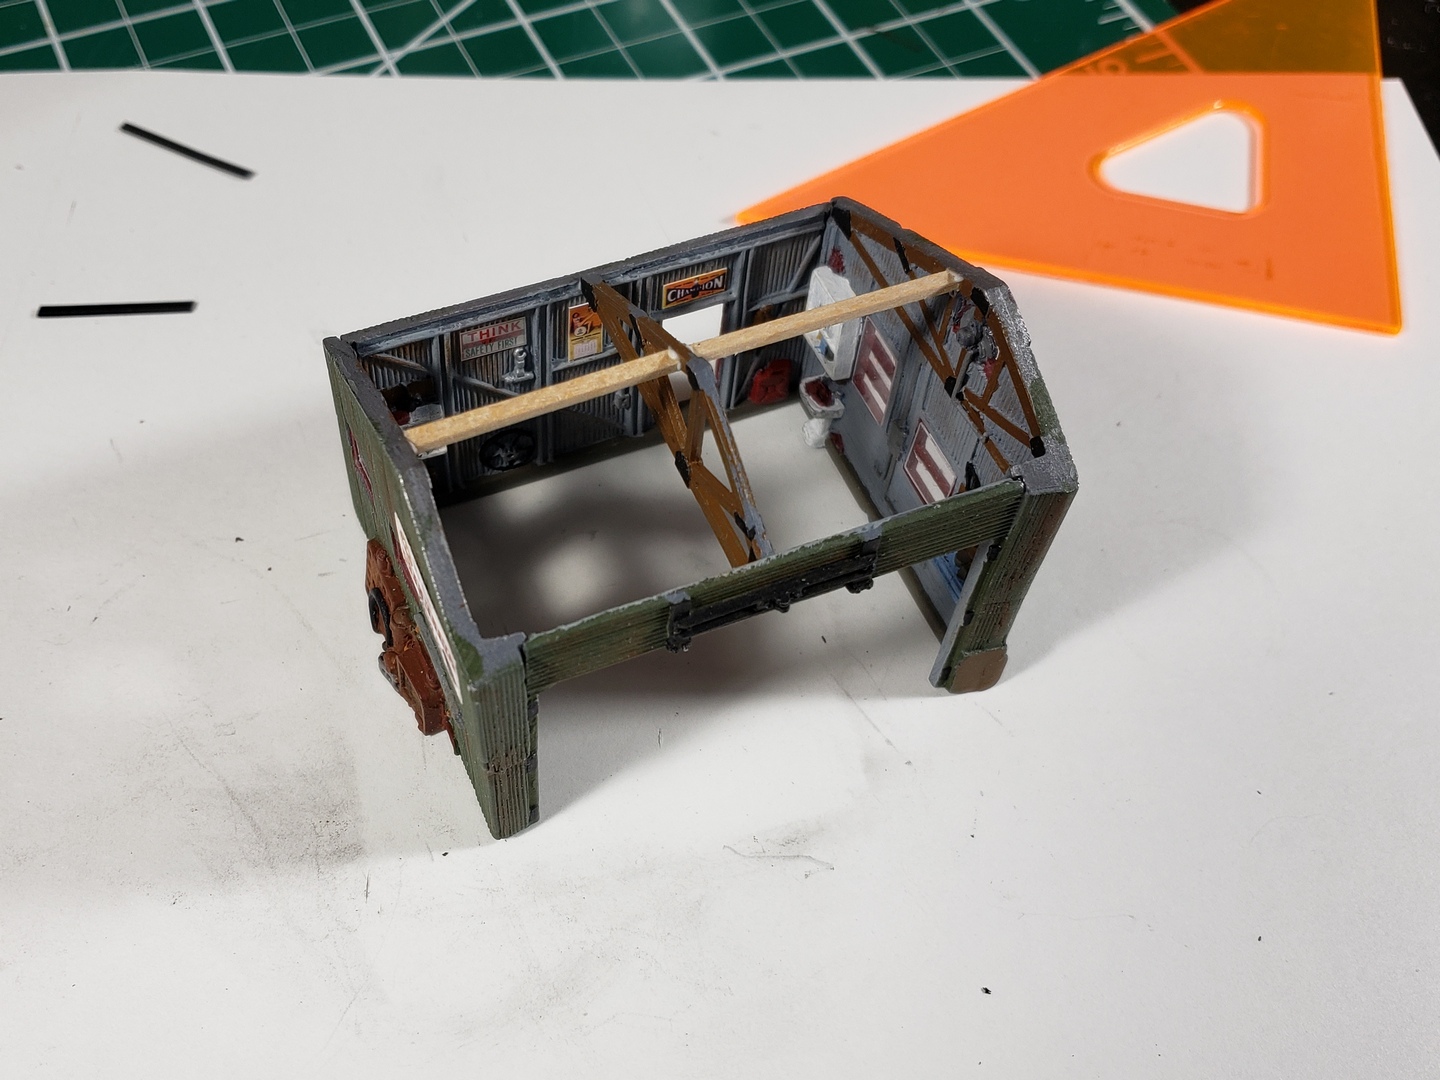
I glued two small warm white LEDs to the bottom of the beam and ran the wires down the corner of the building. They are pretty well hidden.
I cut a piece of .040″ styrene to make a base for the model and glued the floor to it. I hit the floor and the styrene with some dull cote and then painted the styrene with the tan latex I’m using everywhere else for a dirt base coat.
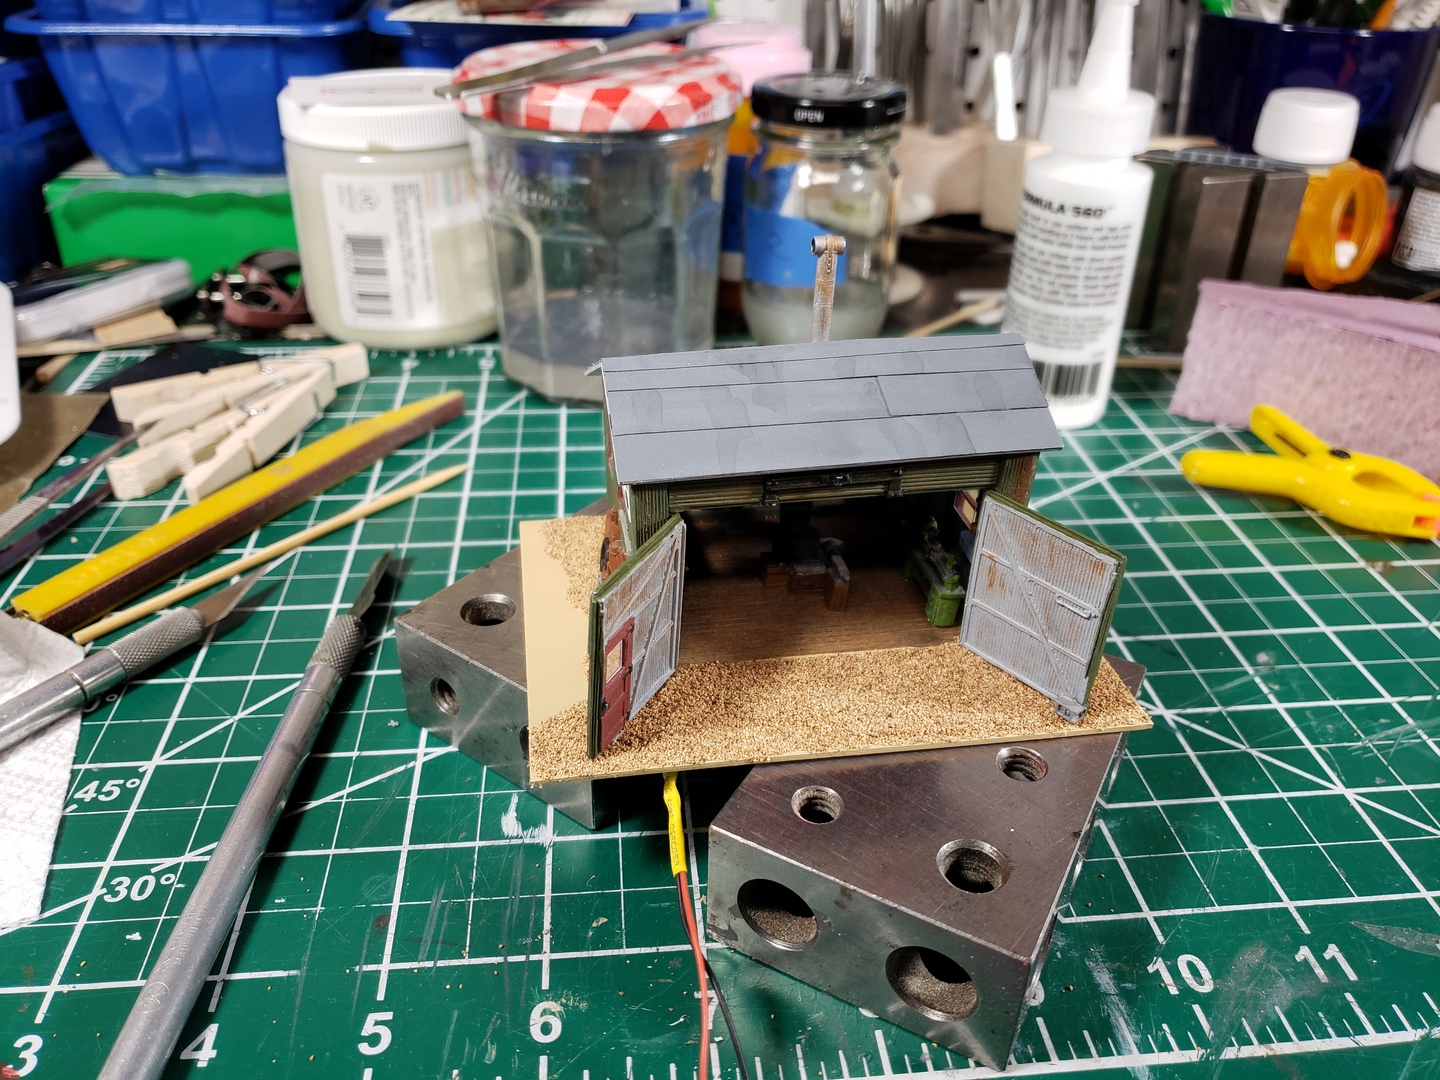
Here is a shot after I glued in the lights and the interior details.
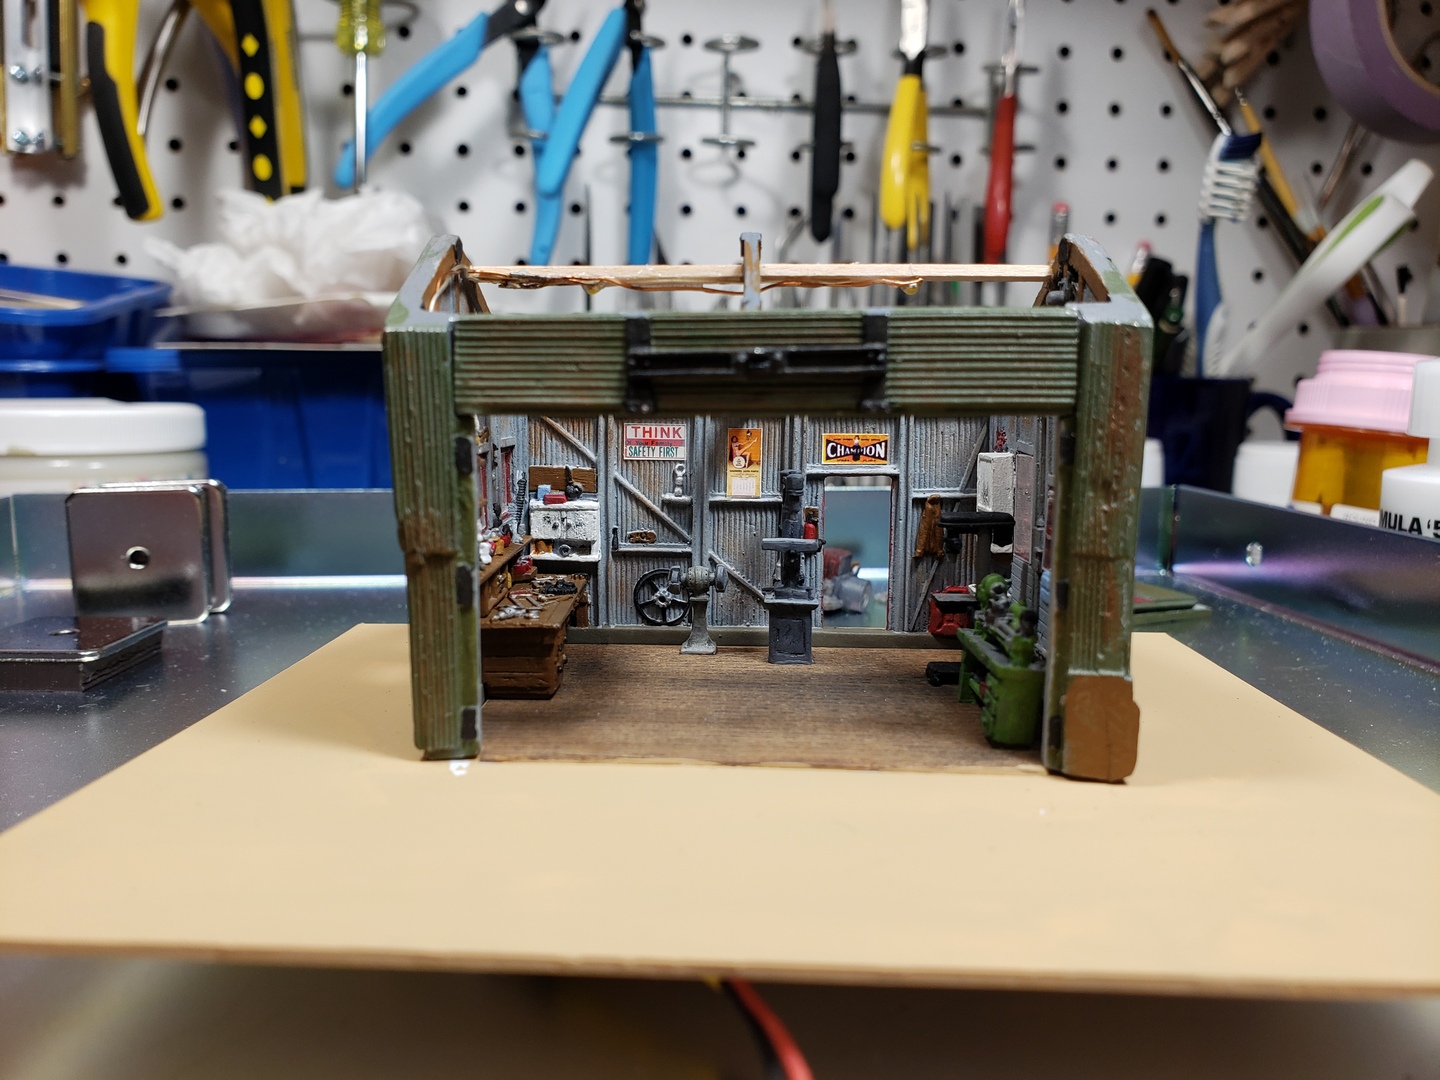
I cut the roof panels out of some black styrene and hit the underside with primer. I let that dry for a while and then painted the underside edges grey to look like weathered wood.
I glued the roof to the building and then I painted some 600 grit sandpaper and stuck it down with double-sided tape.

I glued down some gravel on the base and then glued the doors on.
I decided to change the name and named it after a good friend of mine who passed away a few years ago. So I had to make a sign. I found some clip art online and whipped this up.

Other than some grass and other detritus to be added after it’s situated on the layout, it’s finished.
Here is a night time shot I setup.