Exciting! Yesterday I finished building the benchwork and installed it! I built the benchwork out of 3/4″ sheathing plywood. It’s all hidden so it doesn’t need to be pretty. I ripped 3″ and 2″ strips and used L-girder construction – mostly.
Of course the first step was to figure out how high I wanted the layout. The common wisdom is to put it higher than you might expect, because then you get a more eye-level view when running the trains. I thought this made sense, so I went with a 50″ height. The one concern is that you don’t go so high that you can’t reach the back of the layout but at 50″ high and 24″ deep I can reach the back without too much trouble, and I can always get a step-stool if needed. Actually I’m pretty sure I’ll need a stool to lay track and add scenery, but that’s okay.
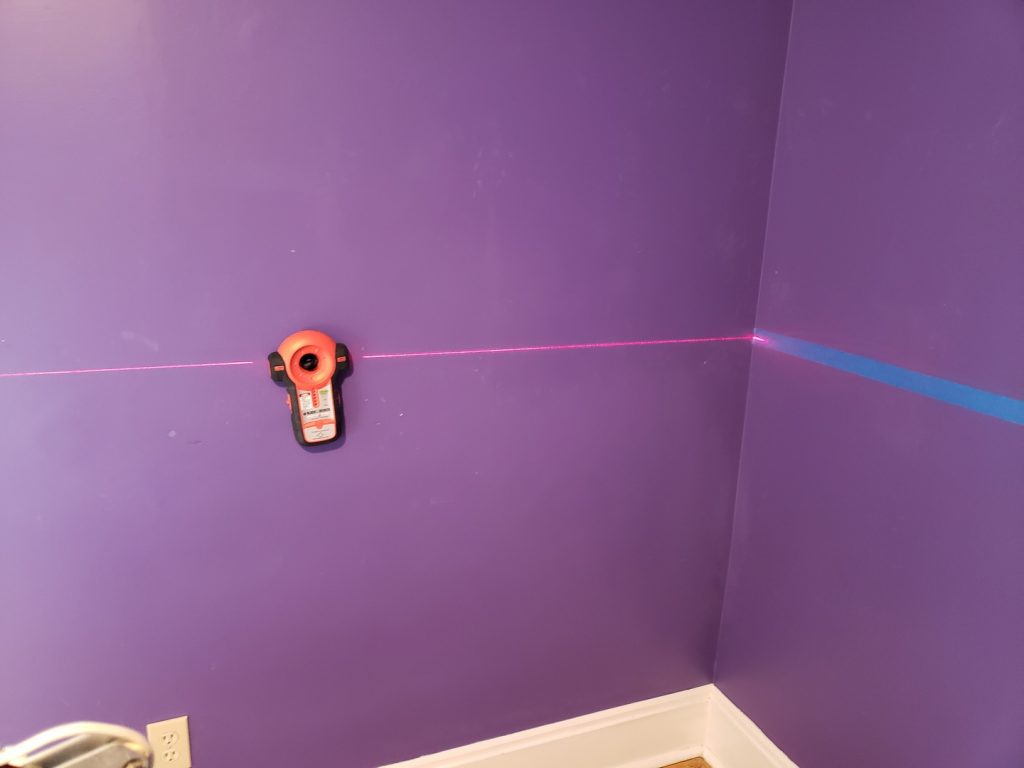
Once I had the height, I subtracted the benchwork thickness (3/4″ + 3″ + 3/4″), the sub-plywood thickness (3/8″) and the pink foam thickness (1-1/2″) to come up with the height for the mounting blocks (43-5/8″). Then I put blue painters tape on the wall at that height (not sure why I didn’t want to just draw on the wall – it’s going to need patching and painting anyway when I need to tear down the railroad) and located the studs.
The I put my laser level up and marked the correct height on all the stud locations.
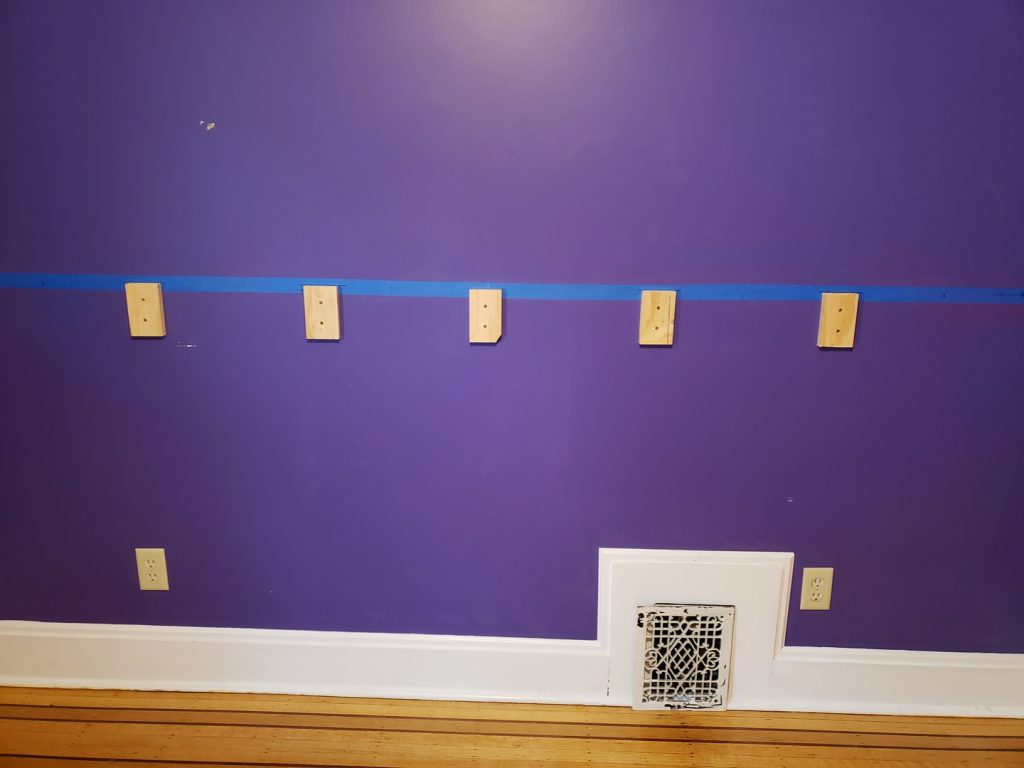
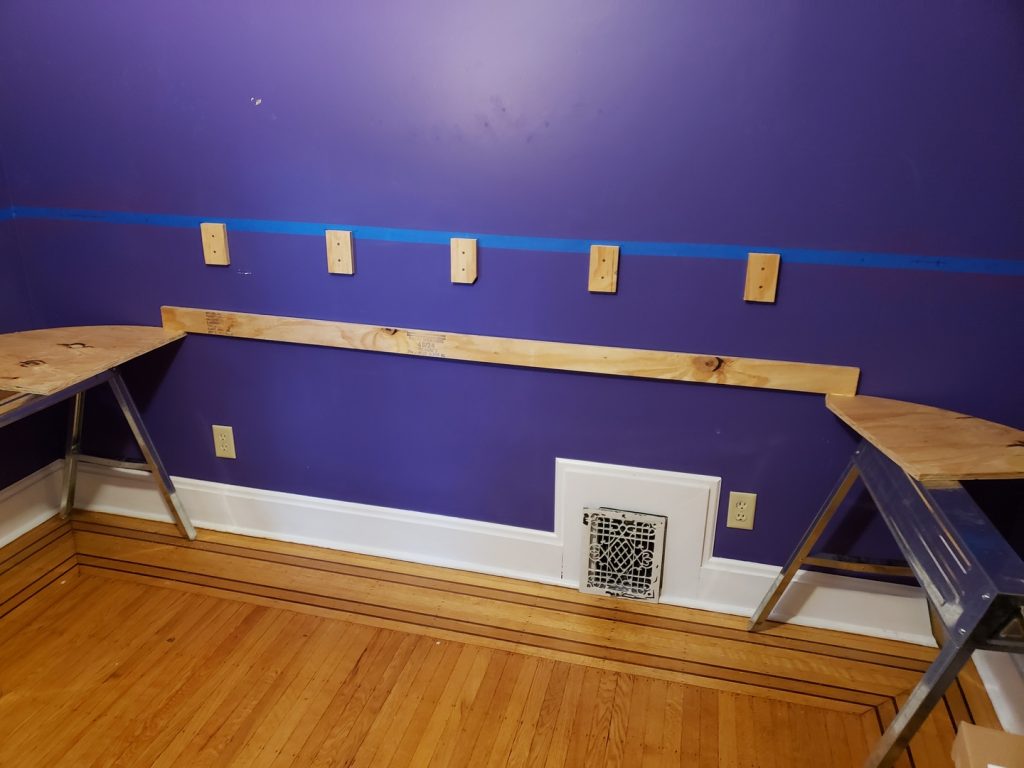
After all the studs were marked, I screwed 3″ x 5″ blocks to them to support the back edge of the layout.
The benchwork is 24″ wide and I wanted curved backdrops in the corners so I cut two pieces of plywood out for each end (top and bottom) and cut a 20″ radius on them. 20″ seems to be about the tightest you can make 1/8″ hardboard bend, but it worked out.
Here is the first strip attached to the plywood end pieces. The working space in the room was pretty cramped.
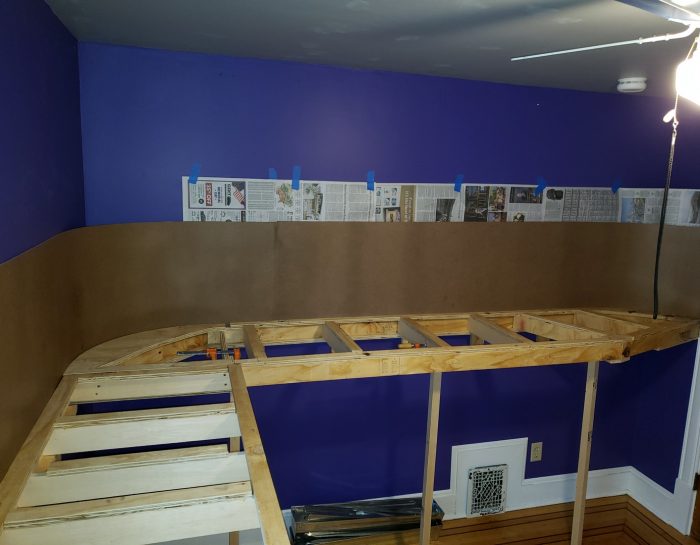
I don’t really have any more in-progress build photos of the benchwork. But here are the two main sections before mounting the backdrop. As you can see, the benchwork tapers into the right corner to clear the door.
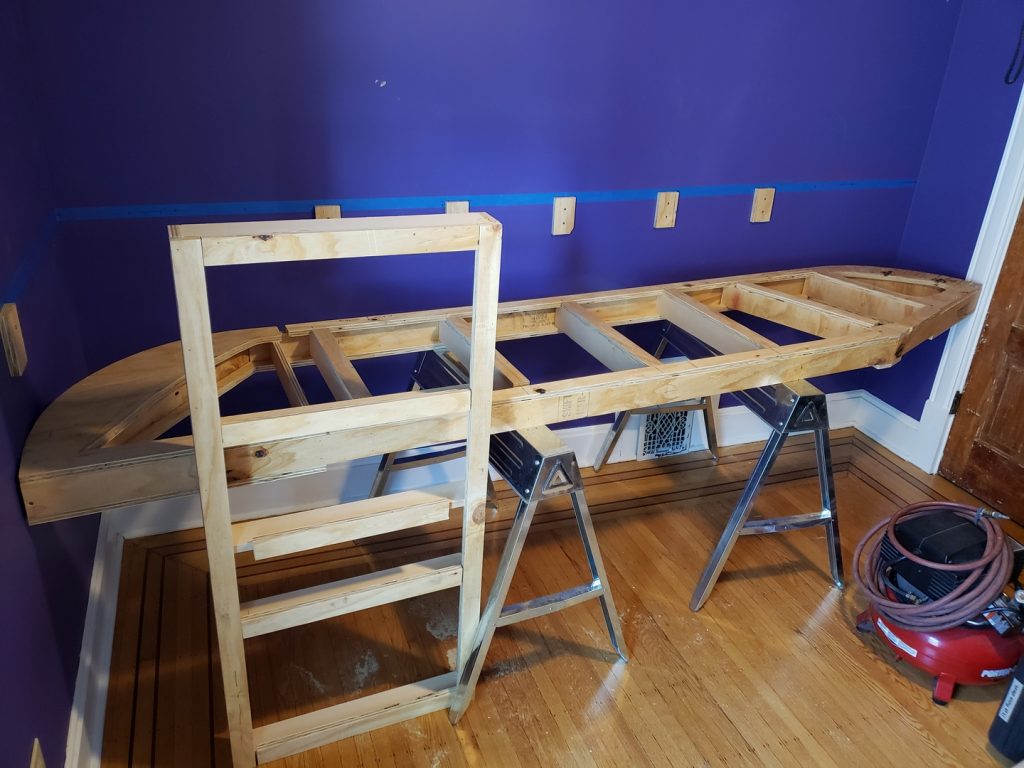
As usual, I made some modifications to the plan as I went. One thing I realized is that having two pieces of solid 3/4″ plywood in the corners might make wiring and adding switch control difficult, so I grabbed the jig saw and cut big holes in the corner pieces. You can see the holes in the picture above.
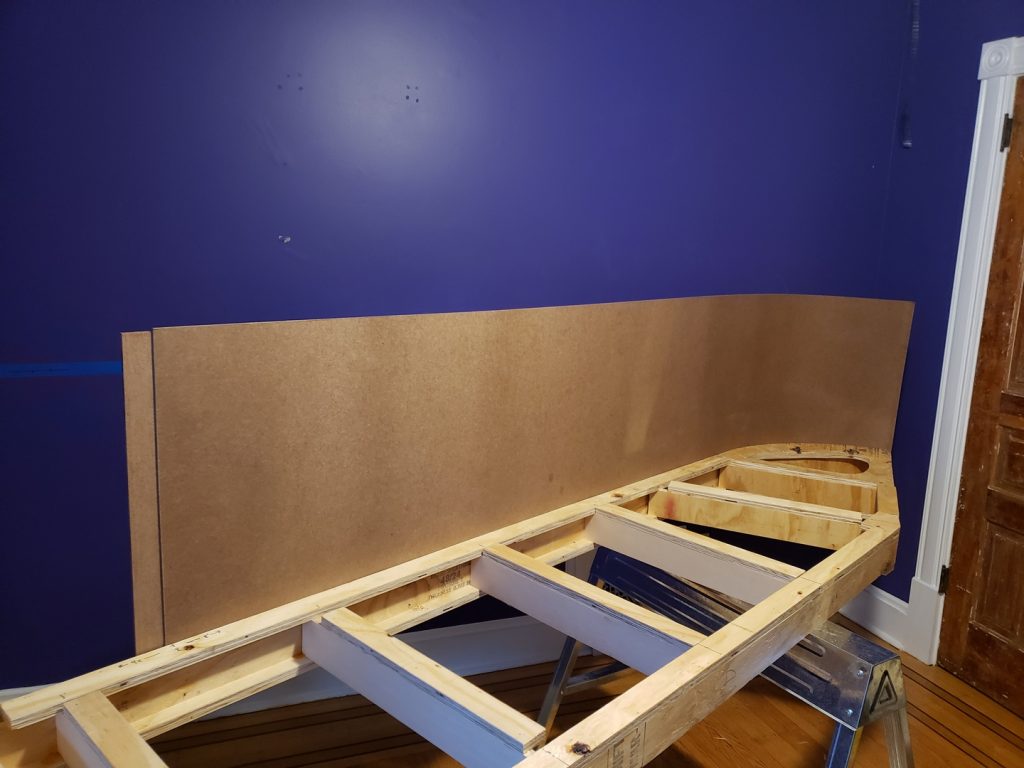
Next was attaching the backdrop. The backdrop is made of two pieces 24″ wide by 8′ long. They are a little unwieldy. I added a tab to the end of each piece in order to glue them together, but left off gluing them together until I had the first piece attached. Working with a 16′ long piece of hardboard would have been tricky.
I drilled some holes in the end of the board to make it easier to screw it to the plywood and just started working my way around the corner adding screws as I went. It worked out pretty well. If I were to do it again I might consider attaching the backdrop to the wall instead of the benchwork, it might have been simpler.
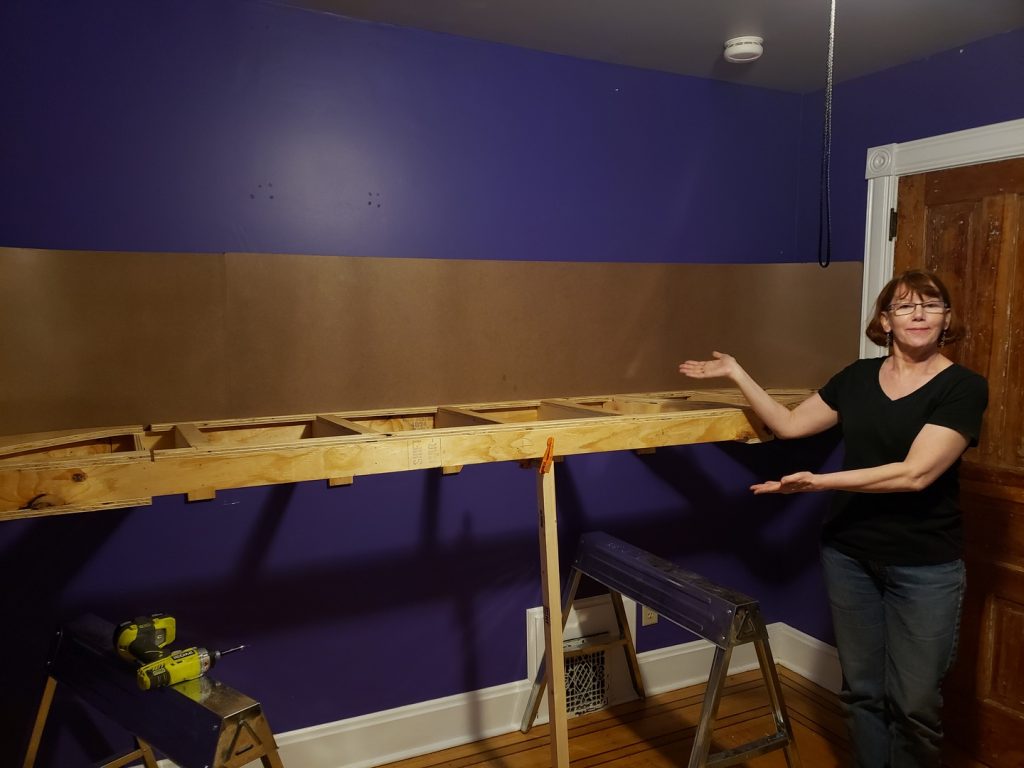
I enlisted the help of my lovely assistant at this point and had her hold up the far end of the second piece of backdrop while I attached it to the benchwork. I did not attach the backdrop to the second section of benchwork and just ended up trapping it between the benchwork and the wall.
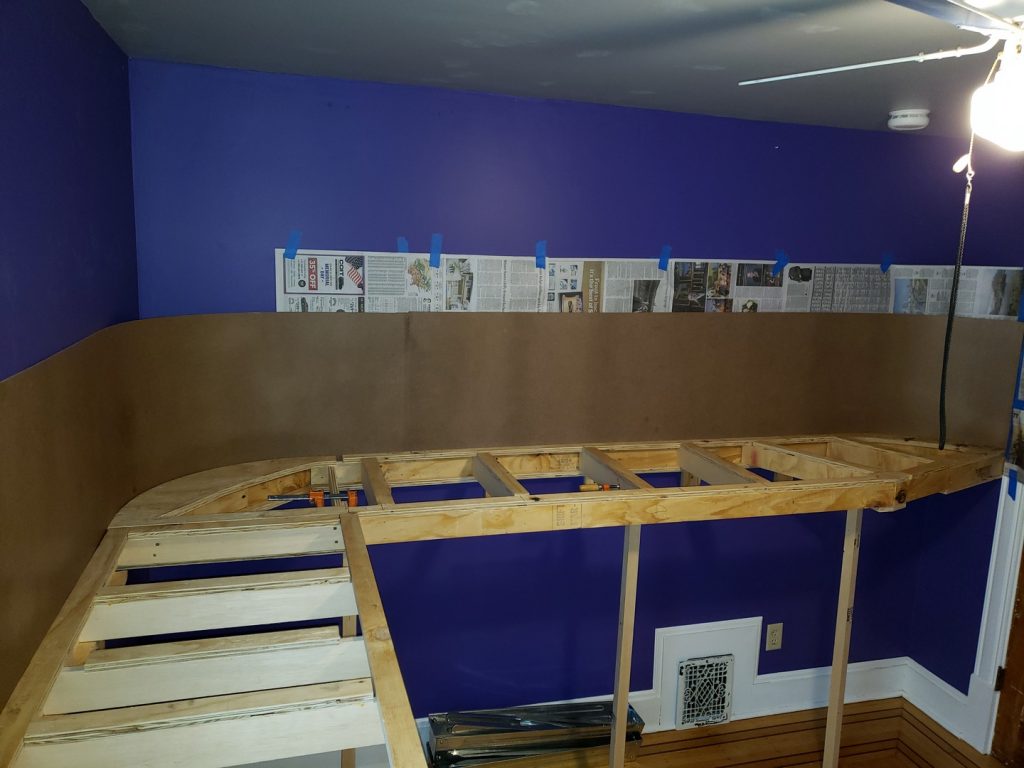
After attaching the backdrop we lifted the first section of benchwork and set it on the blocks on the wall. While my assistant held it in place I clamped a leg to the front to hold it up and then drilled some holes and screwed it to the studs.
After resetting the temporary leg to level the first section, we lifted up the second section and set it on the blocks. I clamped it to the first section, added another leg on the far end and then screwed it to the studs and the first section.
The finishing touches were to ensure it was level in all directions and permanently install the four legs.
It’s difficult to get a good photo of the whole thing because there is a bunch of stuff in the diagonally opposite corner, so this is what you get for now. I’ve started masking off the wall so I can mud the two seams in the backdrop and then paint it sky blue.
The next step after mudding and painting the backdrop will be to install the 3/8″ thick sub-base (already cut out and waiting) and then cut and install the foam. Then it’s time to finalize (mostly) the track plan and start laying track!