My current track plan has about 12 turnouts (switches) in it. The quality code 83 Shinohara (no longer manufactured) and Walthers (coming soon) turnouts cost about $25-$30 each, even on eBay. That’s a lot of cheddar for turnouts. (About $300 if you do the math.)
I’d never considered hand-laying track before, but I thought I’d give it a try. The components are actually pretty reasonable. Central Valley Model Works makes molded plastic tie sets for building turnouts and they are $9.95 for two.
The difficult part is making the frog points. You can buy a kit from Central Valley that includes cast points and some other parts, but that raises the cost to $13.15 per switch, so the cost savings isn’t that great. But you can also buy a couple of tools from Fast Tracks that help you file and solder the frog. These tools cost about $100 for the pair, but they also help you file the points of the switch, so that’s a bonus.
With the Fast Tracks tools, the Central Valley molded tie set, some printed circuit board (PCB) ties and some lengths of rail, you can make your own turnouts pretty easily, and if you have to make a batch of them (like a dozen) the cost goes down pretty quickly. My cost is probably around $16 per turnout, plus you can customize them if you need.
So I figured I’d give it a shot. I used this great guide at Model Railroad Hobbyist magazine.
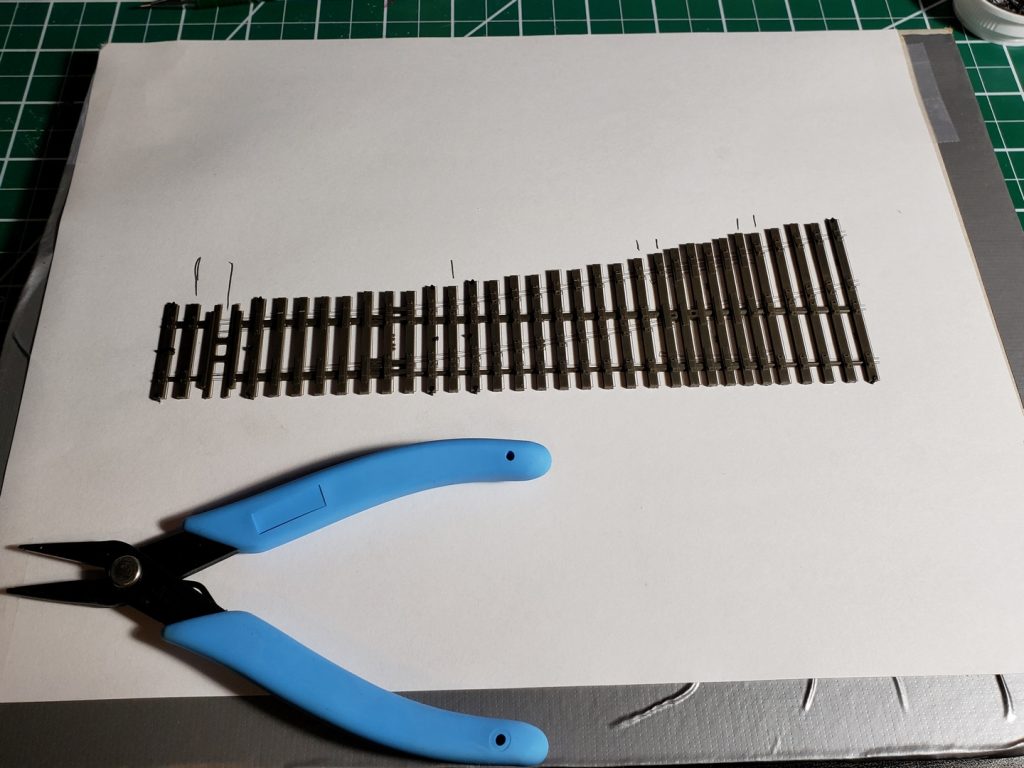
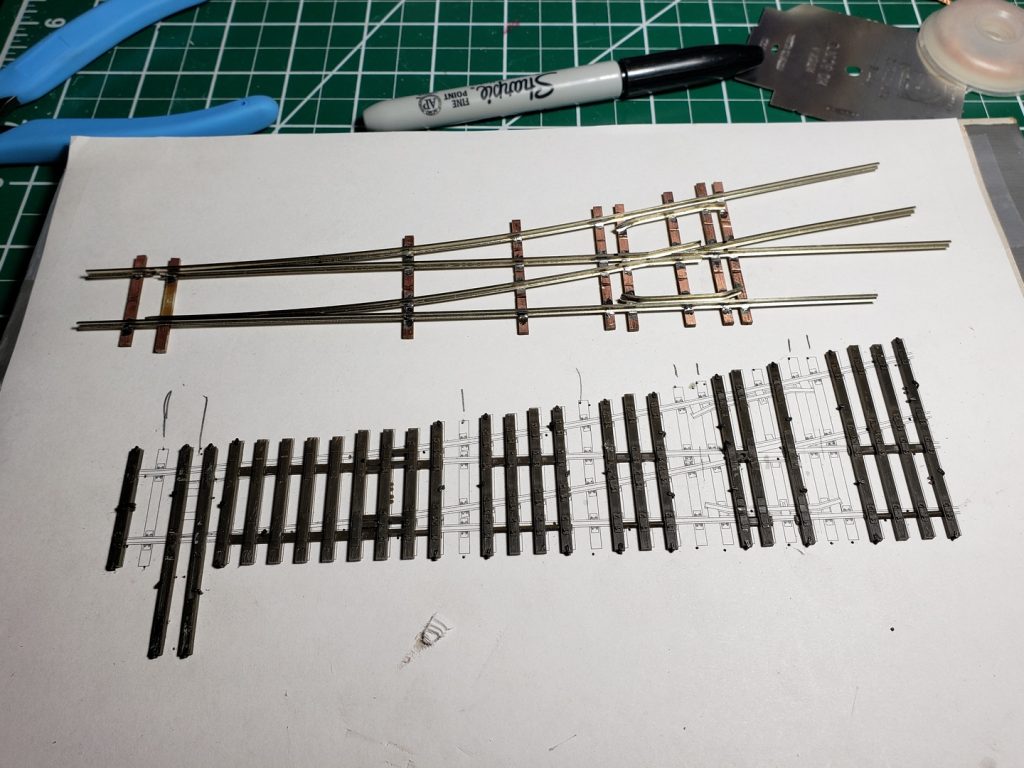
Step one is to remove some of the plastic ties and replace them with PCB ties so you can solder the rails down.
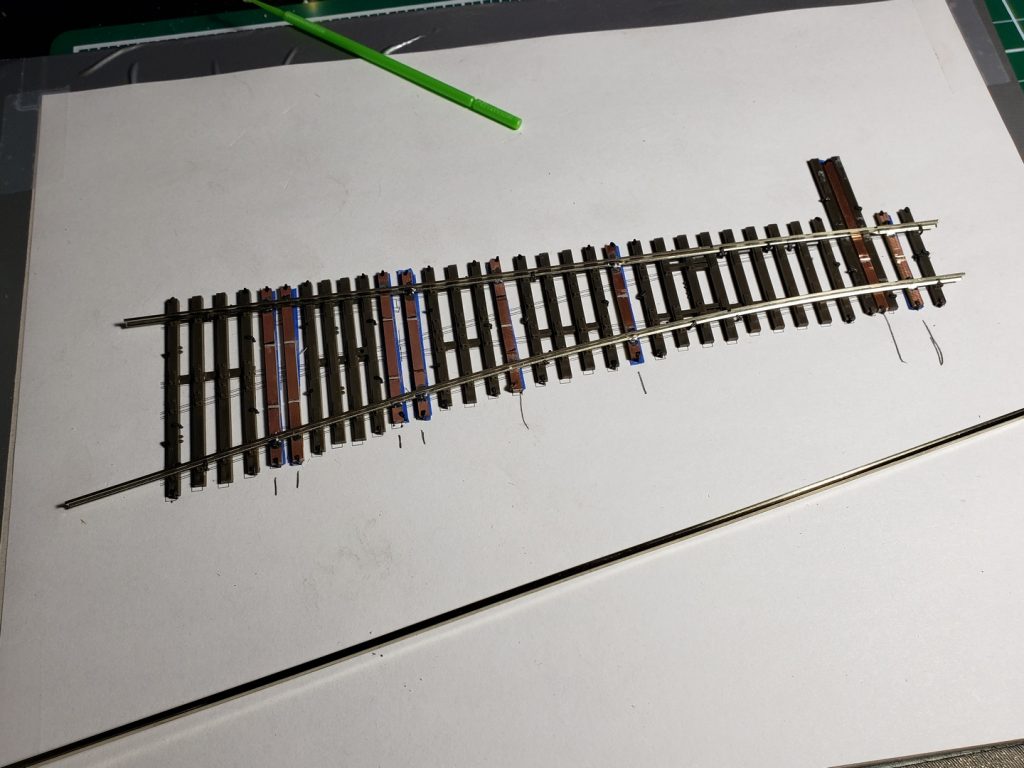
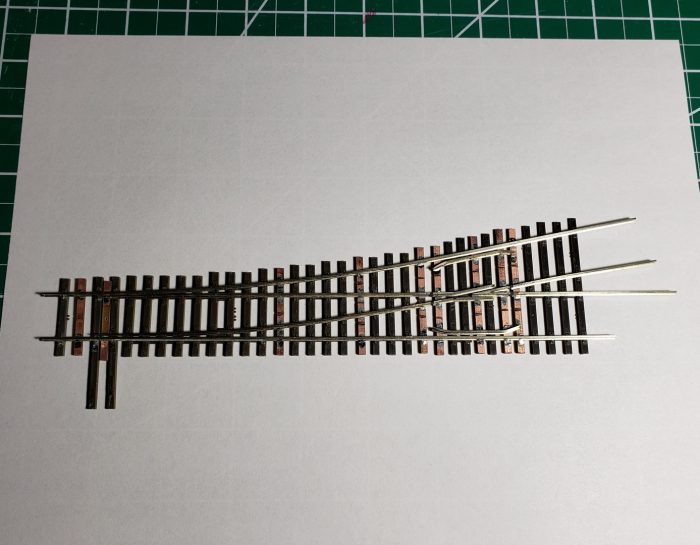
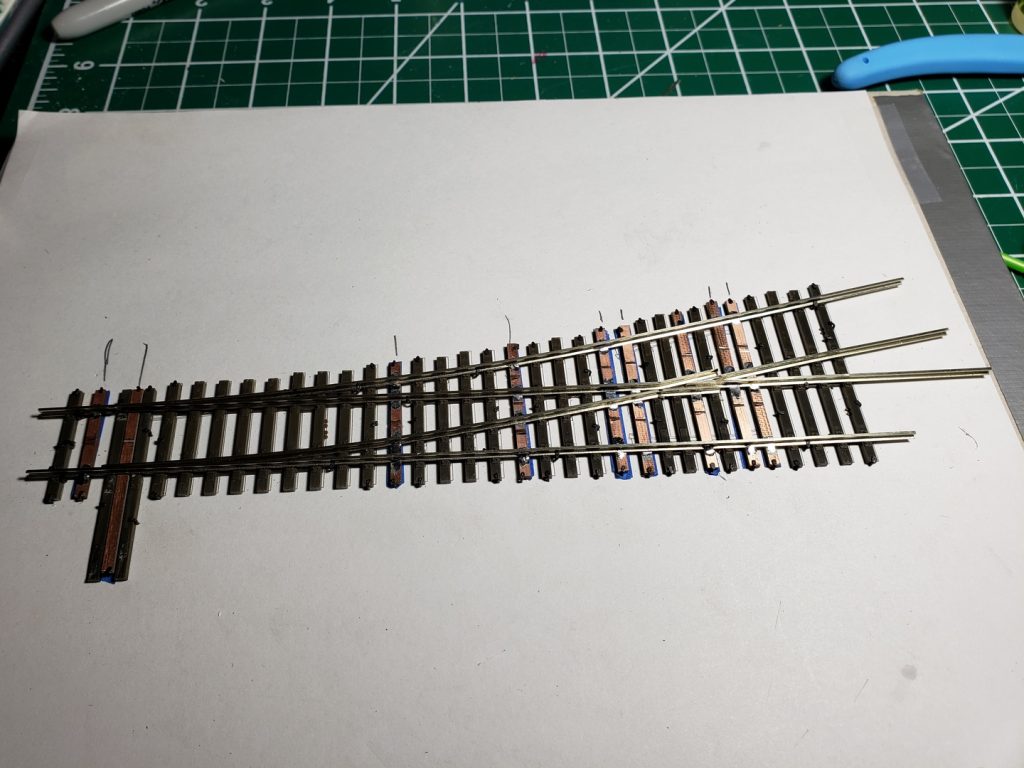
After spiking down the plastic and PCB ties, you solder on the stock rails. The plastic ties have molded in tie plates that guide the rails, so it’s really easy to make sure they are in gauge.
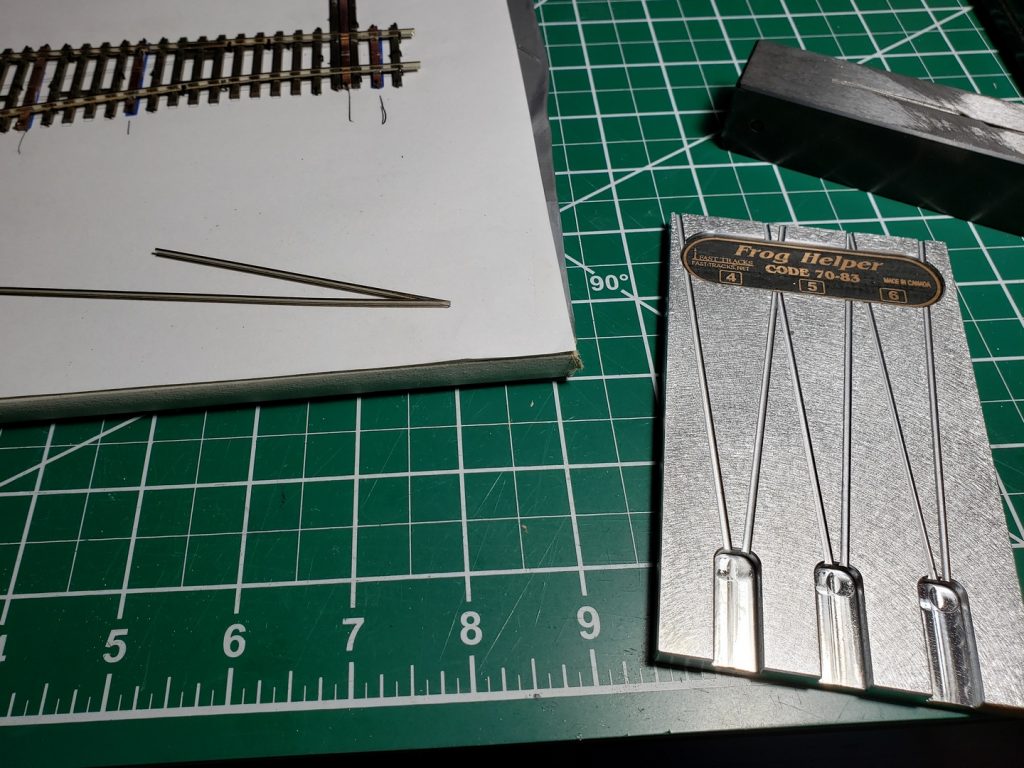
Next you file the frog rails and put them in the fixture to solder them together. Then solder the frog to the PCB ties.
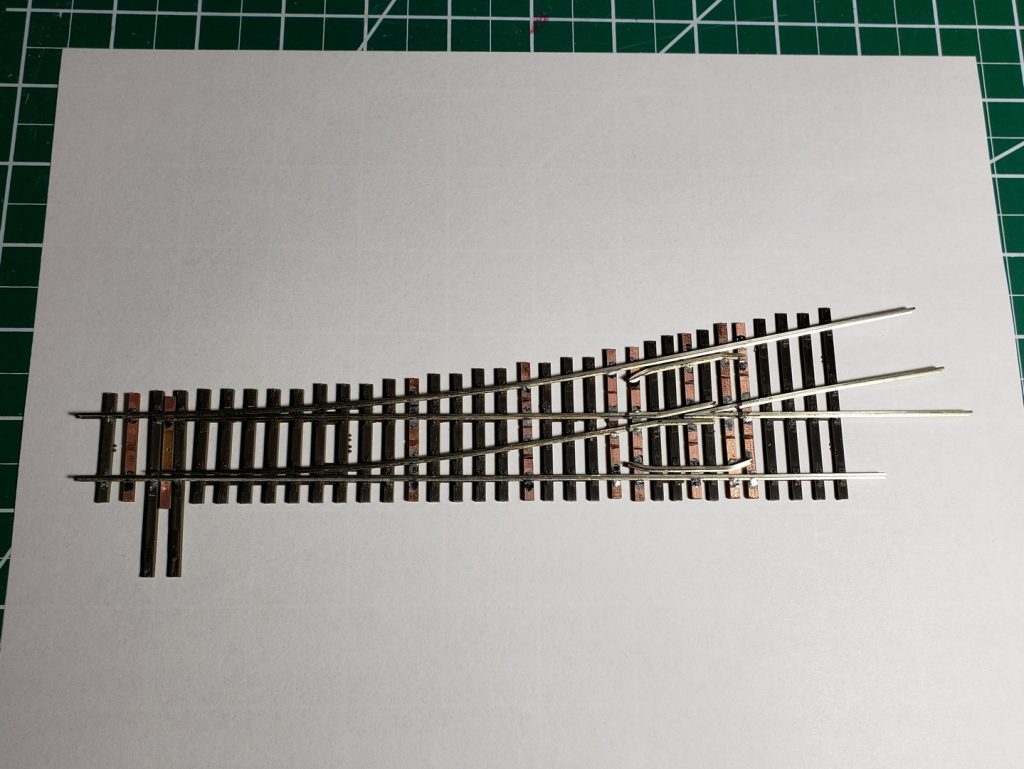
Then you cut the wing rails to length and bend them and you use the jig to file the ends of the wing rails to form the point rails. There are no hinges when you make the turnout this way. Solder down the wing rails, then solder the points to the throwbar.
Bend up some guard rails and solder them down, then you can remove the rails from the plastic ties for any clean up needed.
Next glue the rails to the plastic ties with CA glue. Honestly this part was the largest pain in the ass. Tips to make this go better: clean the bottoms of the rails, and maybe do it in sections.
The only step left at this point is to hit it with some brown spray paint.
This was not nearly as difficult as I expected it to be so I will be hand building all the switches that I need for this layout.